The original idea for the bag started over 2 years ago but it was a long process to finally see the finished product through.

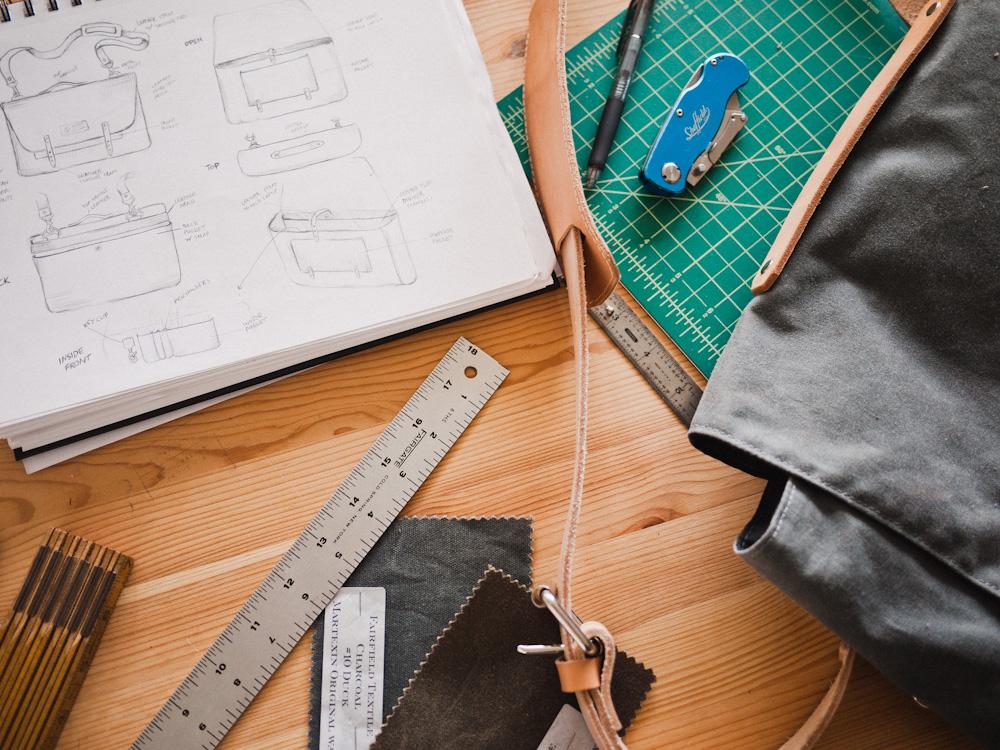
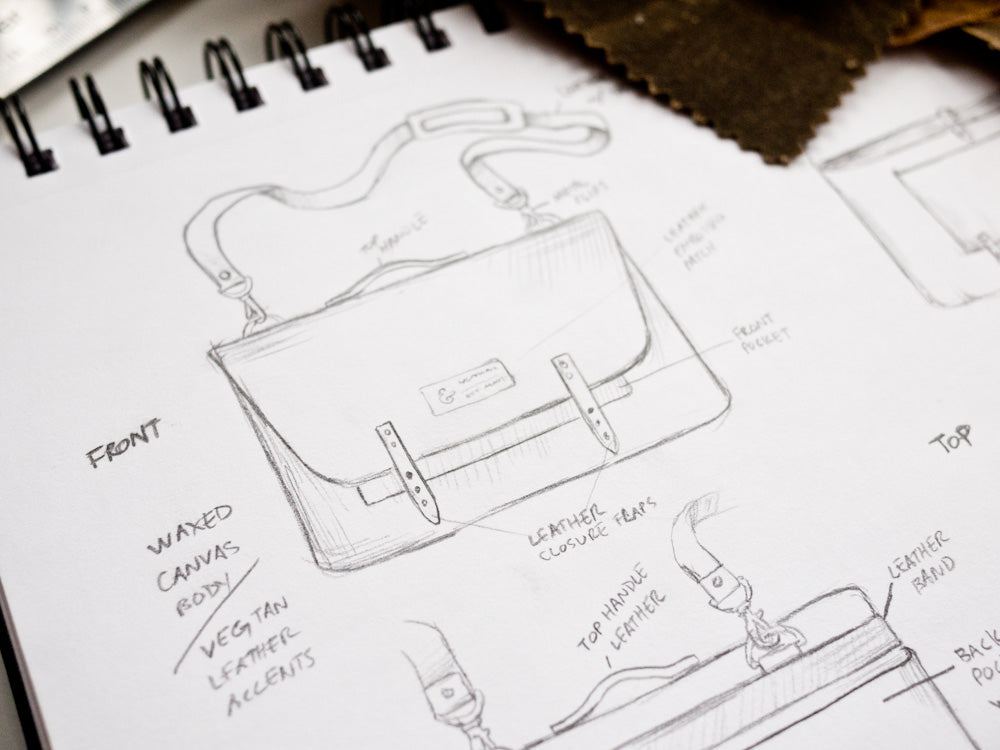
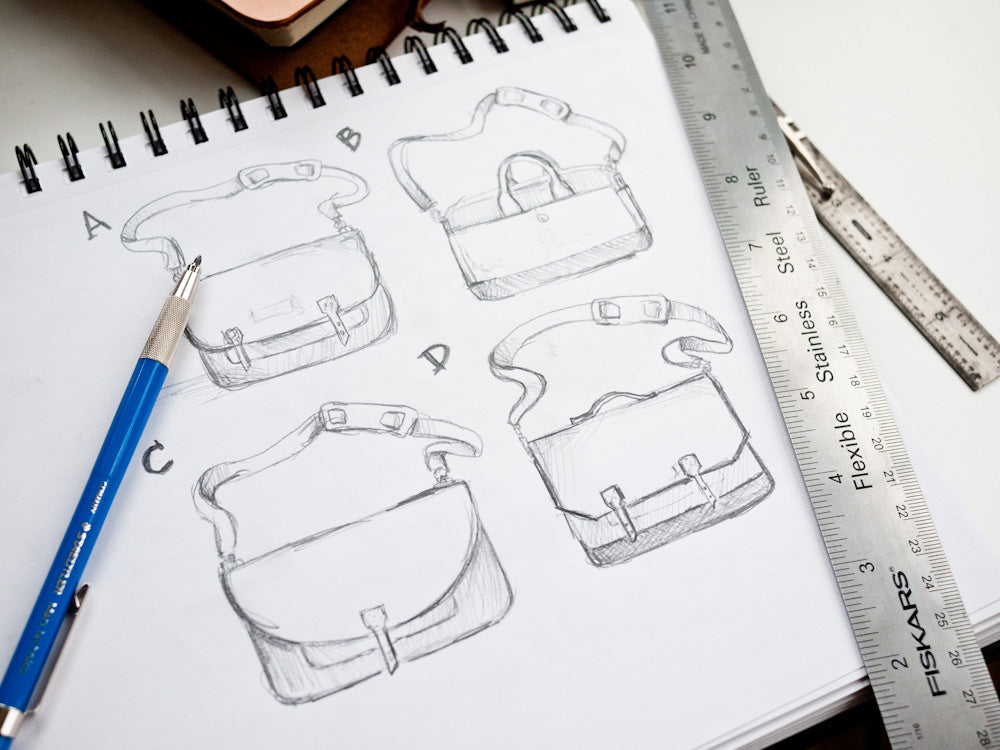
Concept Sketches
I started by sketching out a variety of concepts that incorporated the functionality that I wanted in a bag. I can't emphasize enough how much it helps to start with pencil and paper rather than jumping right onto the computer. I also researched other bags, making notes of things I liked and didn't like about each. The bag style that I eventually landed on is similar to a traditional postal messenger bag. One of the key things I noticed from those classic bags is how the shoulder strap attached to the back of the bag instead of the ends. This allows it to lay flatter against the body instead of bumping up against your hip while walking. These sketches helped me think through the various functionality and details.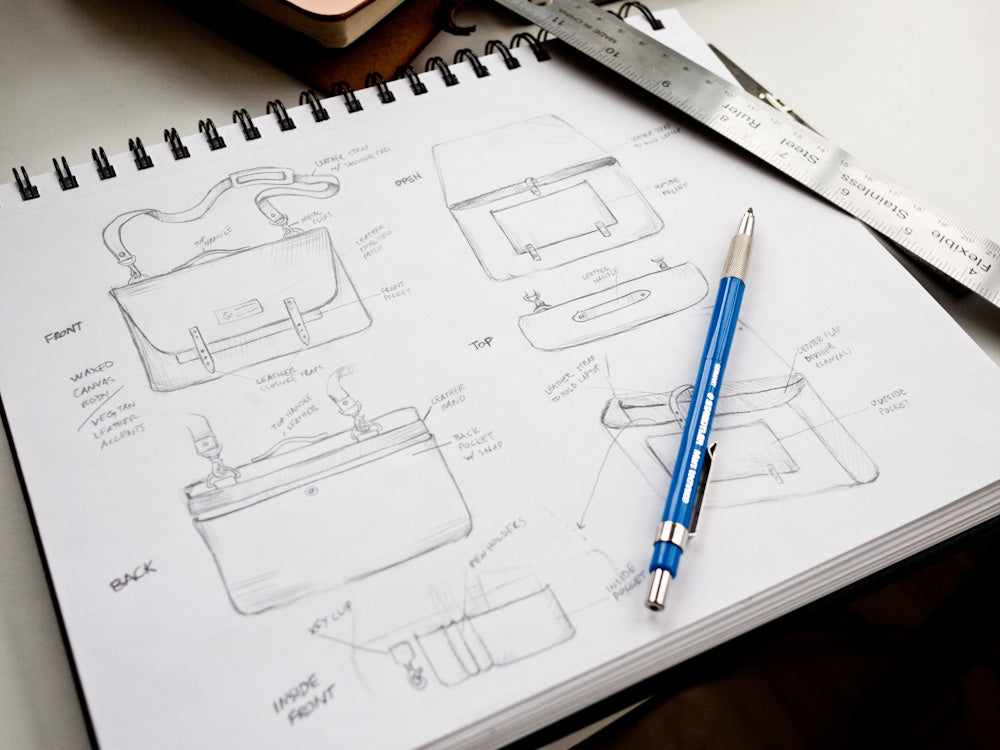
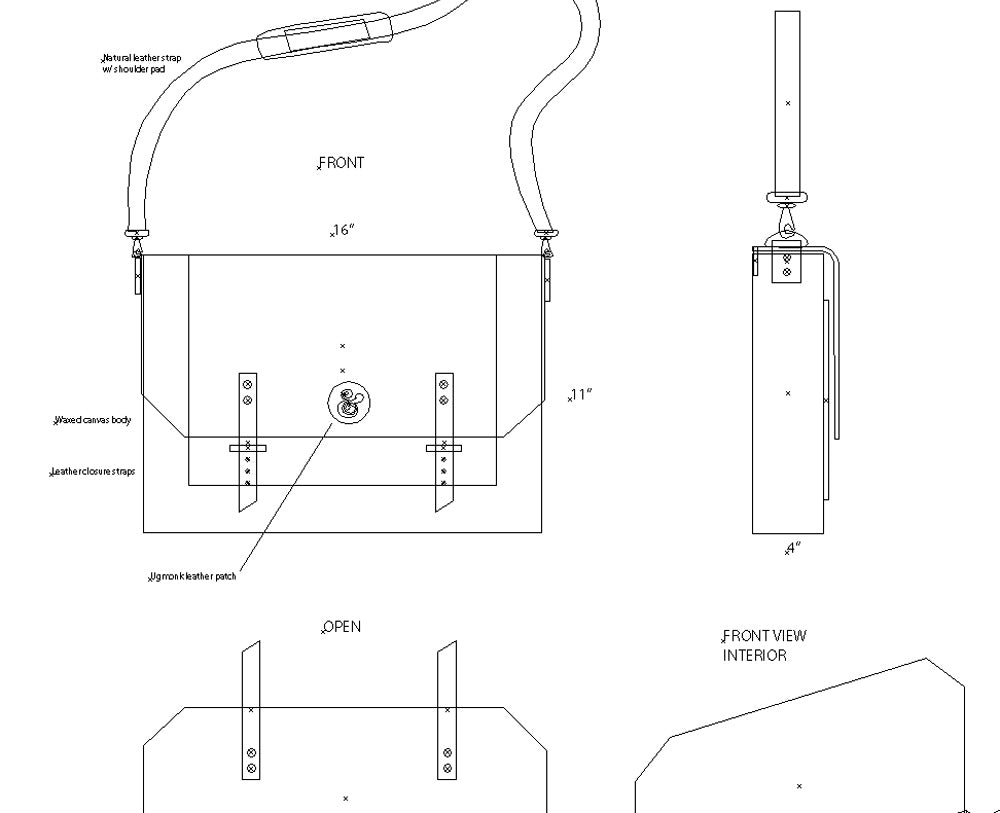
Digital Mockup
I don't have any sewing or pattern-making experience, but I knew it would be helpful to draw the bag digitally to get a more precise mockup to send to manufacturers. This also helped me figure out the dimensions and proportions for each part of the bag. Though some parts of the bag were altered during the actual prototyping process, this gave me a solid idea to work from.
Sourcing
One of the hardest parts of the entire process was finding the right manufacturer to work with. I wanted to find a place in the USA that not only specialized in this type of high quality bag making but was also willing to accommodate low minimums for the first run.I could have easily just found blank stock bags from a Chinese manufacturer and added some Ugmonk branding, but I wanted to produce a completely custom bag with the highest quality possible.Since this was a completely different product than anything I have produced so far, I needed a place that would help guide me through the manufacturing process and give input based on their expertise. Many of the larger factories I contacted wanted a fully-designed bag to work from and didn't seem to take a personal interest in helping me through the process. After contacting over 40 places I finally found a company in Portland, Oregon (with help from Maker's Row) that specialized in making the type of bag that I was looking to produce.
Moral of the story: don't give up even when the search seems hopeless.

Materials
When researching materials to build the bag from I kept gravitating towards the combination of waxed canvas and leather. Waxed canvas is a rugged water-resistant material originally developed for fisherman and navy sailors back in the 1800s to keep them dry and warm.Not only is it durable and functional but it also ages beautifully with use and wear.I've released a number of other Ugmonk leather products over the past few years and have learned about the different types of leather in the process. Most bags produced overseas use cheap bonded leather or faux-leather that breaks down quickly with use. If you've ever purchased a cheap wallet or belt and had the outer layer start to peel off and crack then you know exactly what I'm talking about. We chose to use full-grain vegetable tanned leather (similar to our other leather products) that is super durable and will hold up for many years of heavy use.
The leather starts off a little stiff but softens over time and conforms to the individual use pattern.For example, if you tend to carry the bag on the same shoulder the strap will smooth out and form to that particular shape. Unlike most things, these materials actually get better with use and wear.


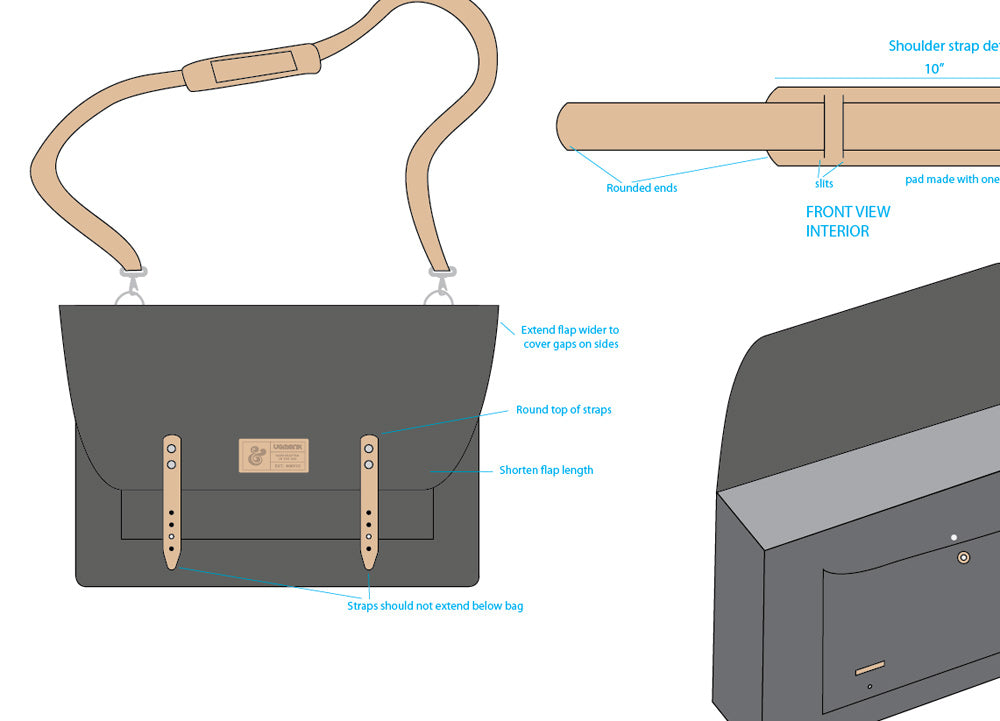
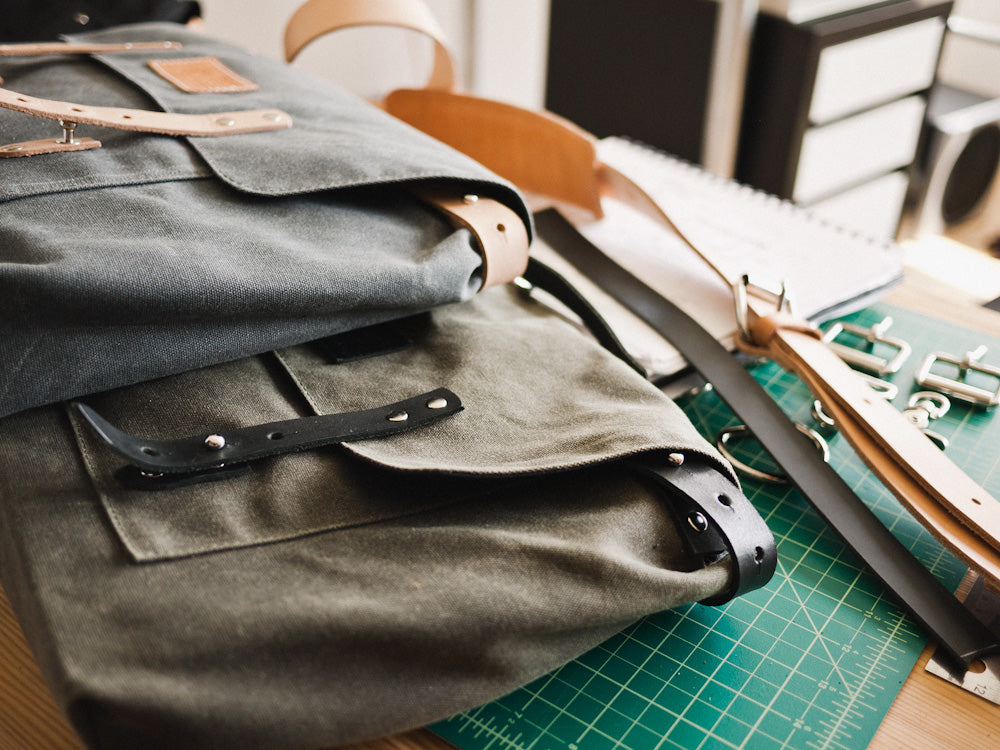
Early Prototypes
It's hard to know exactly how the sketches will translate until creating the first physical prototype. After I had the first prototype bag in hand I noticed a number of things that needed to be modified and improved. For example, the original canvas that I chose was too thin and didn't have enough structure making the bag feel too flimsy.
Since I only had a sample swatch of the canvas it was hard to know that it wouldn't work well for a whole bag, but that's why it's important to build out the whole product before proceeding with the full run. We also tweaked a number of other things like the length of the front flap, extending the back leather strip to help cinch the sides closed, and using more streamlined hardware.


Final Prototypes
After these revisions were made, some additional prototypes were produced to ensure the proposed changes and new materials fixed all of the issues. Each one of these prototypes takes time and costs money, but they are all part of the investment of creating a superior final product.I could have easily cut corners along the way and used cheaper materials or simplified parts of the bag, but it was important to me that these bags were the best they could be.This means that our final production costs were much higher than anticipated. If our main focus was selling wholesale our retail price would have to be double what it is now but since we sell directly to the customer we are able to produce an exceptional product and still keep the costs as reasonable as possible.


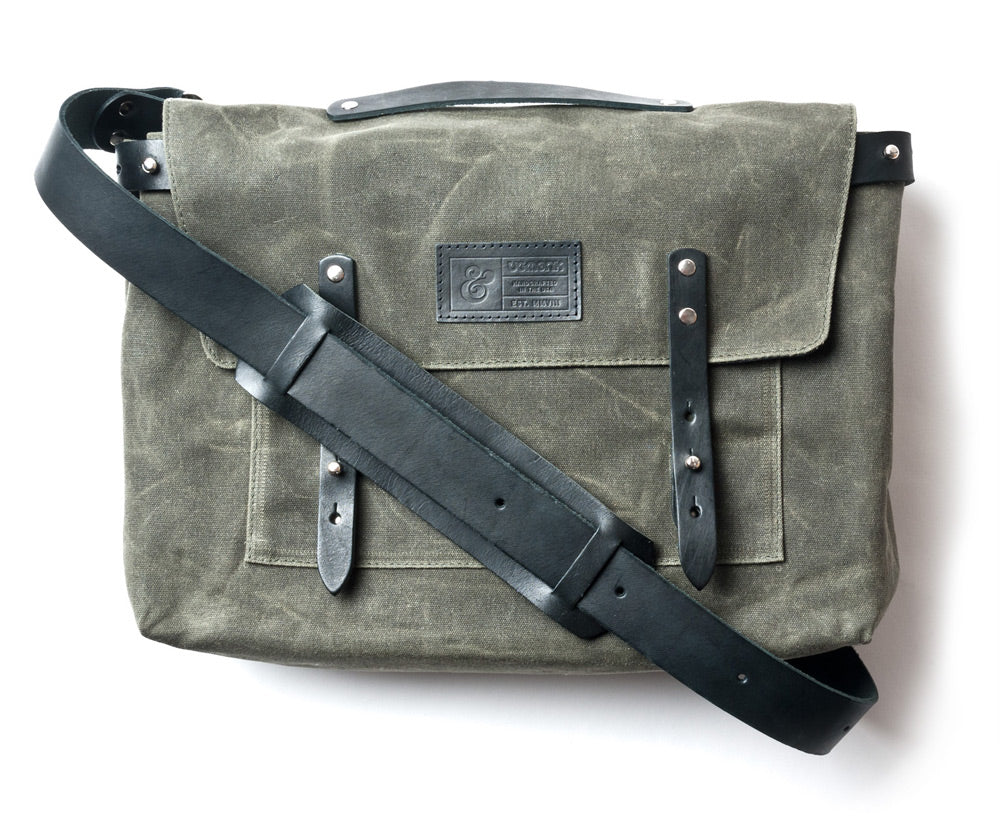
Product Photography
It was an amazing feeling to finally have the finished bags in hand. The bags looked and felt incredible in person but I wanted to make sure that the same quality and detail really came through in the product photography. Too many people overlook this part when selling online and skimp on photography.This is the only interaction a potential customer will have with the bag and it's vital that the photos reflect the quality of the product.I spent several days photographing the bags and designing the product page layout and flow. Scroll through the product page here to see all of the details.


Launching the Bags
After 2 years of work (on and off) it felt great to finally flip the switch and launch the bags in the shop. As with any product I never know what the response will be, but I was thrilled when the first run of bags sold out in just two weeks! I've learned a lot through the process (including how to be patient) and am looking forward to applying this knowledge to future products. Hope this gives you some insight into what happens behind the scenes to make these bags reality.Thanks to all of you who continue to support Ugmonk and help me bring new products to market!
Buy the bags here