Designing and launching a product may seem like a relatively simple task from the outside, but there are hundreds of steps to getting an idea from inside your head to a physical product in your hand and then releasing it to the public and finally shipping it all over the globe. Back in 2009, when Ugmonk turned one year old, I thought it would be fun to celebrate by designing a special limited edition anniversary shirt to celebrate. At the time I didn’t think much past that, but the next year I decided to design a full limited edition set and each year I’ve continued this tradition. It's a fun challenge to raise the bar each year.
Here’s a detailed look at what it took to design, manufacture, and launch the 7th Anniversary Set:
1. Concept & Design
The first stage was brainstorming the general concepts and ideas. At this stage I try to think as far out of the box as possible not worrying too much about pricing or manufacturing difficulties. Any time I think of something, I’ll add it to the list of potential ideas to explore.Rough Ideas
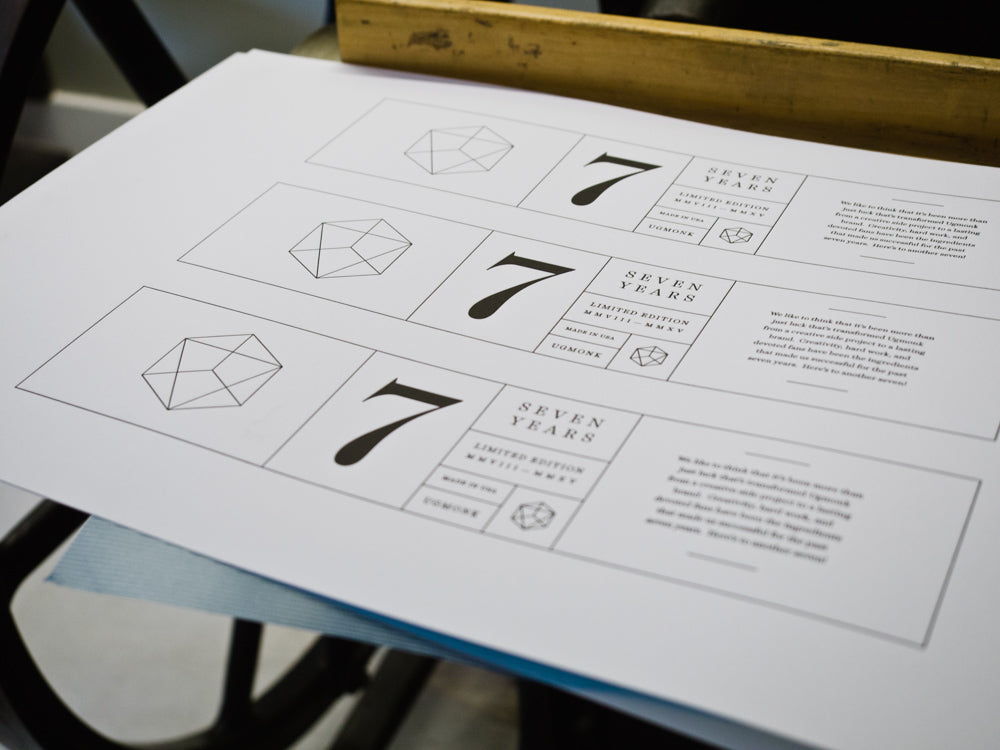
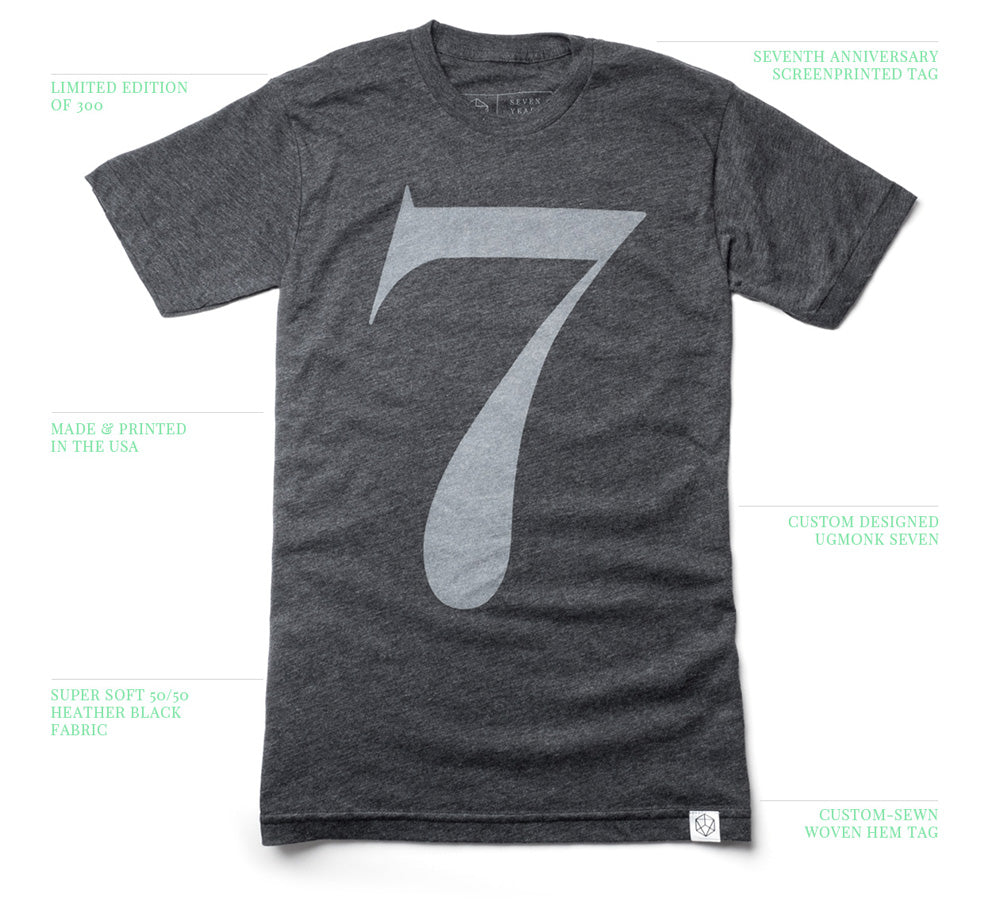
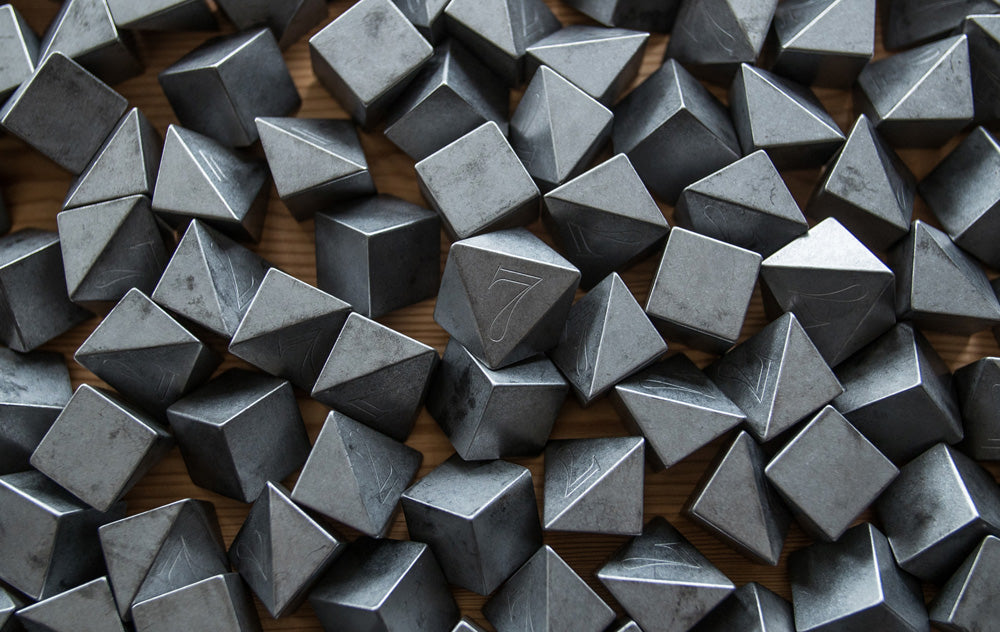
I started with a general aesthetic in mind, but the design ended up evolving quite a bit from the early concepts. I always like to start with pen and paper to rough out ideas. Using paper allows me to explore a variety of styles and ideas without being constrained to specific typefaces or tools within Illustrator. These initial thumbnail sketches are super rough and usually don’t see the light of day but are helpful to get the creative juices flowing. For the 7th Anniversary Set I wanted to do something specifically playing off the number seven. Seven is already a favorite number known for it’s luckiness, but I didn’t want to just rehash the idea of luck with this year’s set. I wanted to focus more on a clean, elegant seven and allow it to live in it’s purest form. At the same time, I wanted to add an extra layer of depth to give it the trademark Ugmonk touch. When thinking about different interpretations of the number seven I came across the 3D seven-sided shape called a “heptahedron.” As soon as I saw it I immediately knew that I wanted to incorporate as the secondary design element in the set.


Sourcing
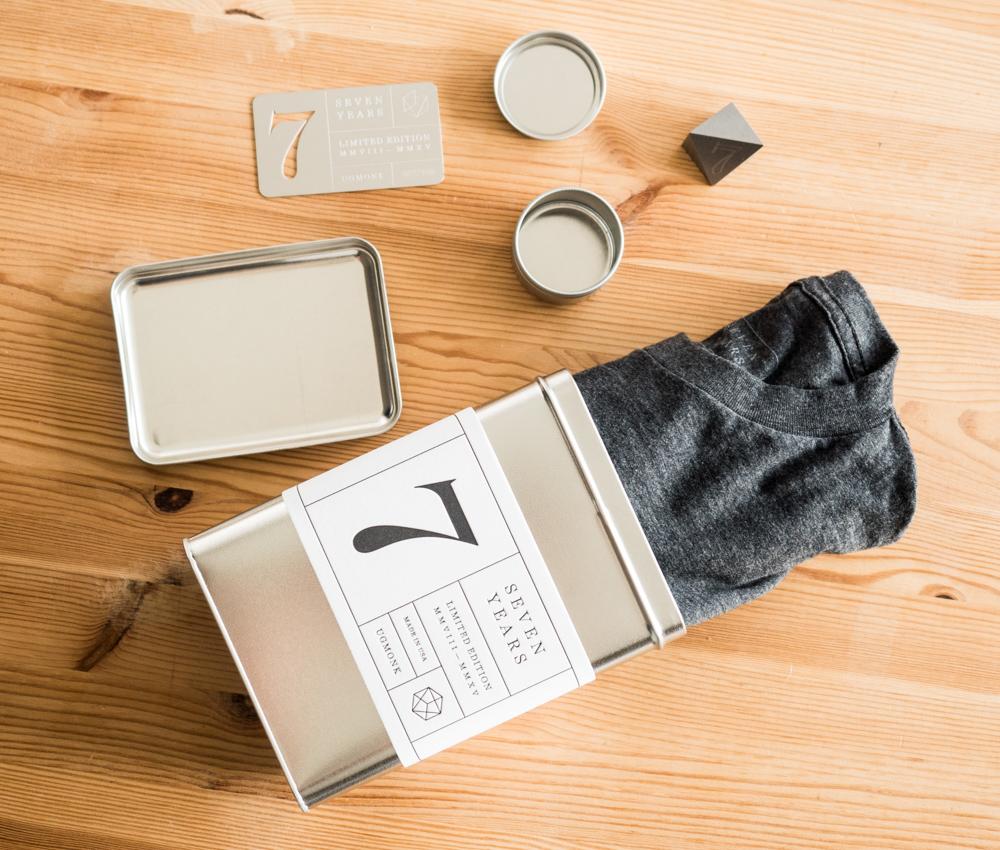
With the general aesthetic and list of ideas in mind it was then a matter of narrowing down the different items that I wanted to include in the set. One of the trickiest parts of producing these sets is figuring out what’s feasible for a short run production at a reasonable cost. Finding manufacturers involves lots of googling, emails, and phone calls. Unfortunately there is no single source or magic directory that can make anything and everything. Even with Google at our fingertips this can be incredibly time-consuming and frustrating. For the 7th Anniversary Set I had to work with 6 different manufacturers. Producing the steel heptahedrons was an especially huge challenge. Even though we’ve made other metal products in the past, nothing is automatic. The manufacturer that we had worked with in the past fell through at the last minute and left us back at square one searching for a new manufacturer. Most of the machine shops and fabricators that I contacted about making the steel heptahedrons didn’t understand what I was trying to create or simply weren’t interested. It took a lot of leg work to finally find a new machine shop to create exactly what I was envisioning. This unexpected setback actually delayed the whole 7th Anniversary release several weeks.


Refining
Once I had honed in on a specific aesthetic direction and selected the final parts of the set, I dove into refining the design elements that would be carried throughout. During this process I quickly mocked up the designs on blank t-shirts and other items to get a better idea of how they would look as final product. A design may look great by itself but doesn’t always translate well to a t-shirt or packaging depending on the proportions and shape.


Production & Manufacturing
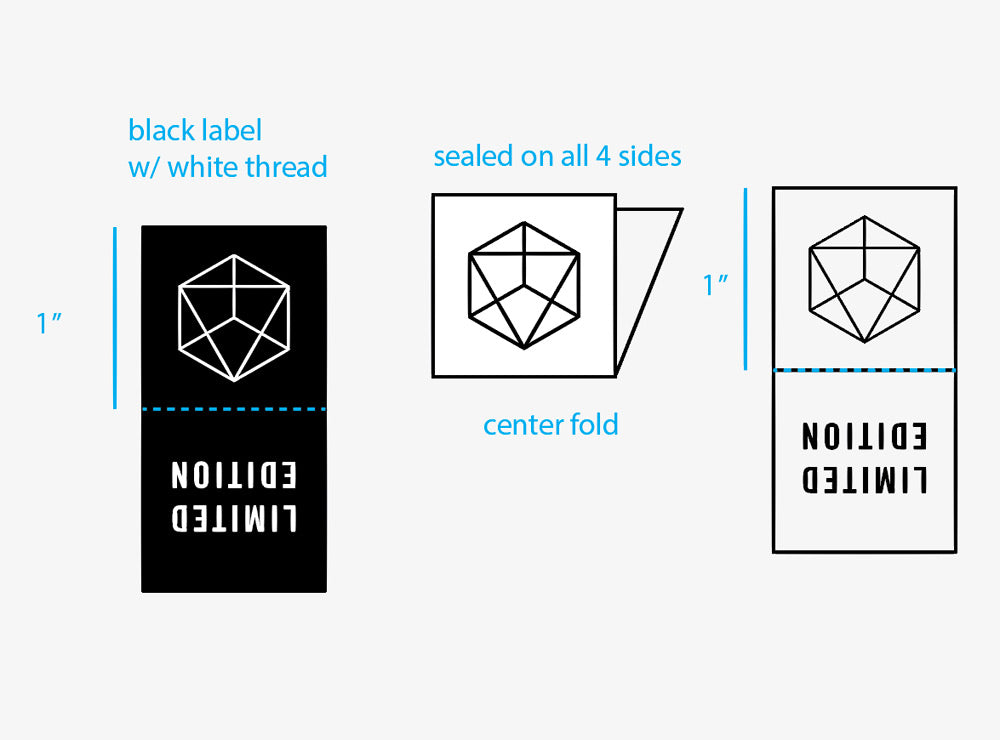
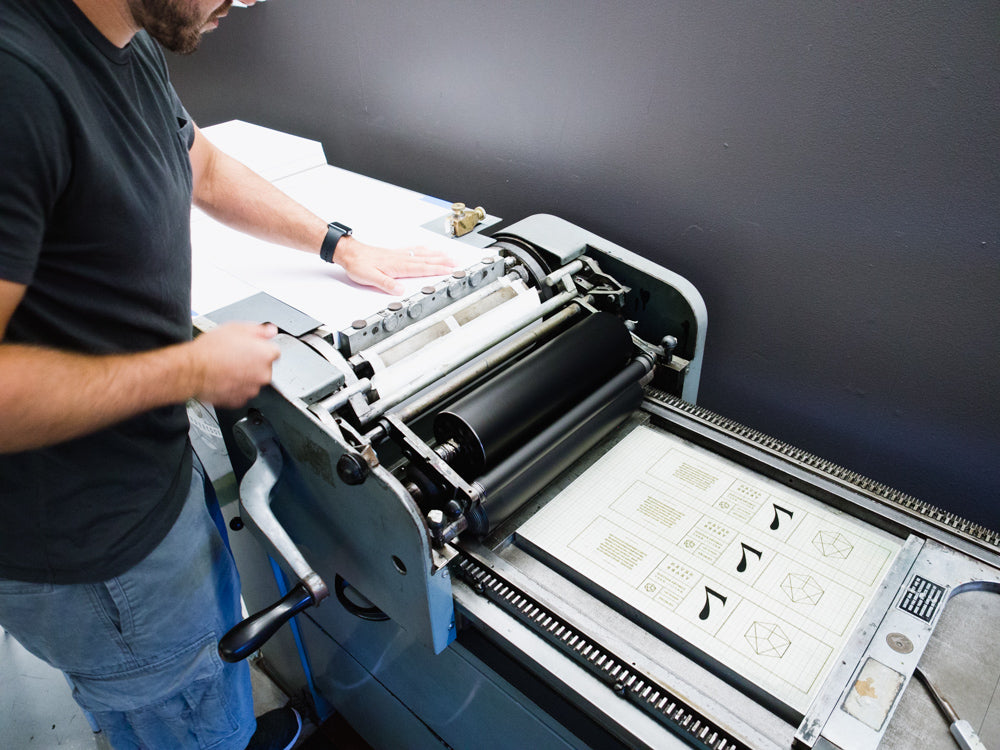
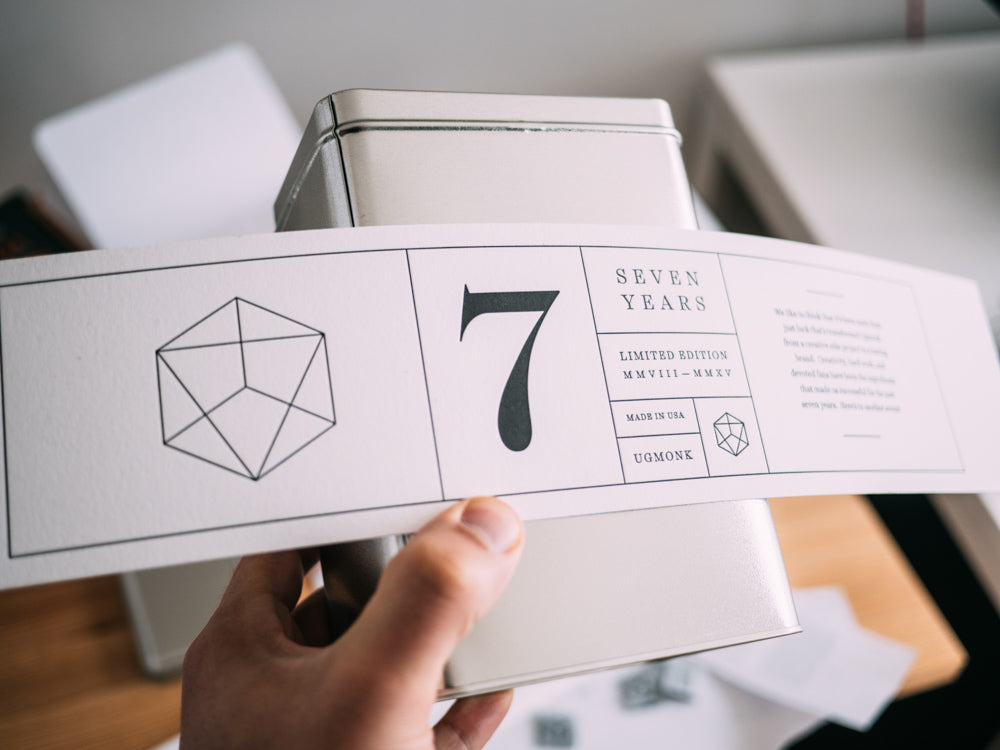
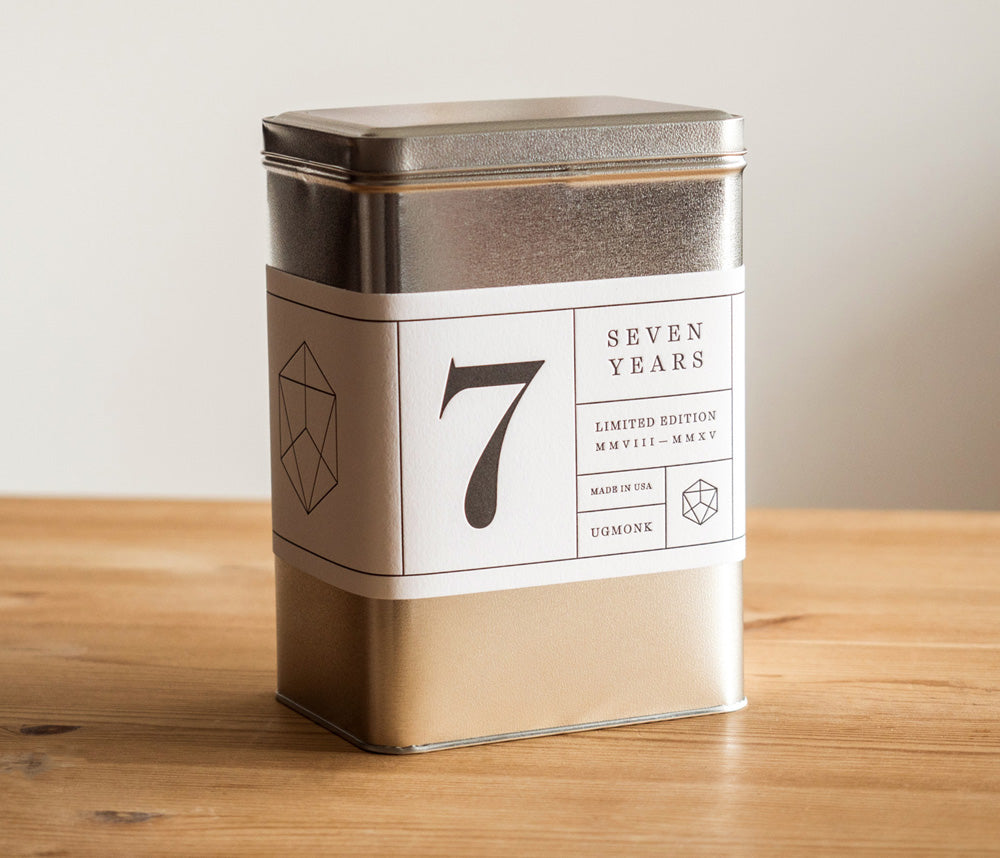
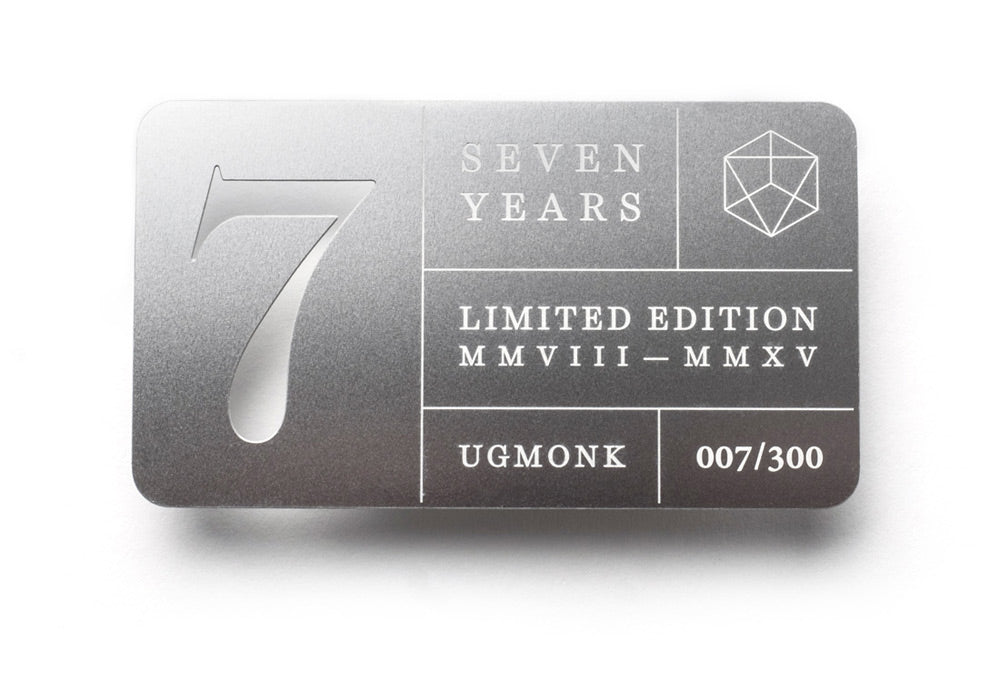
Designing a product is only half the battle. Producing physical products isn’t as easy as just pressing File>Print. It’s a multistep process that involves a lot of back and forth communication and rounds of sampling with each manufacturer to dial in the details for each piece. For example, the small serif type on the tin label design looked great on screen but had to be tweaked ever so slightly for the letterpress printing to get the best result. Rather than digitally printing these, I chose to use letterpress printing for a more premium feel. Even though this process has been around for hundreds of years it still creates a crisp, tactile print that digital printing just can't replicate.


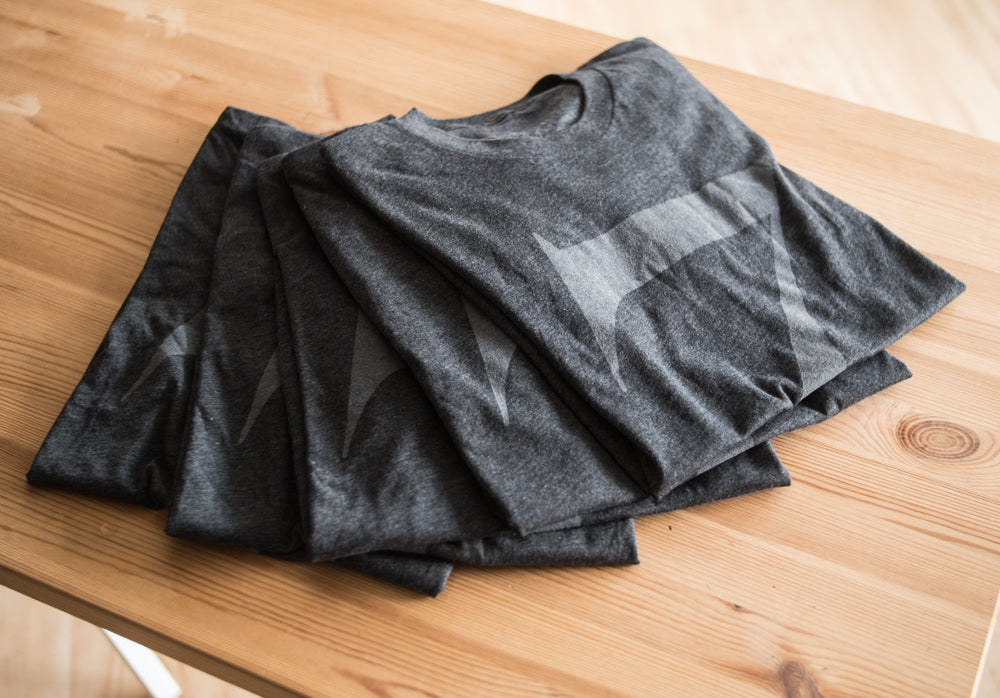
 For the 7th Anniversary tee we wanted a semi-transparent print that would allow the heather gray fabric texture to show through the ink and also leave a super soft print. This took a few tries to nail the opacity and exact look we wanted. When sending the t-shirt artwork to the screen printer we’ve learned that it’s not enough to just email the artwork and assume they understand everything clearly. Working with a good manufacturing partner is certainly half the battle, but even then, it’s important to verify and iterate to make sure things are in line with your vision.


2. Pre-Launch
Once all of the pieces of the set had been produced and we had everything in hand, it was time to prepare for launch. This involved assembling the sets, photographing them, and designing all of the assets to prepare for launch.Product Prep
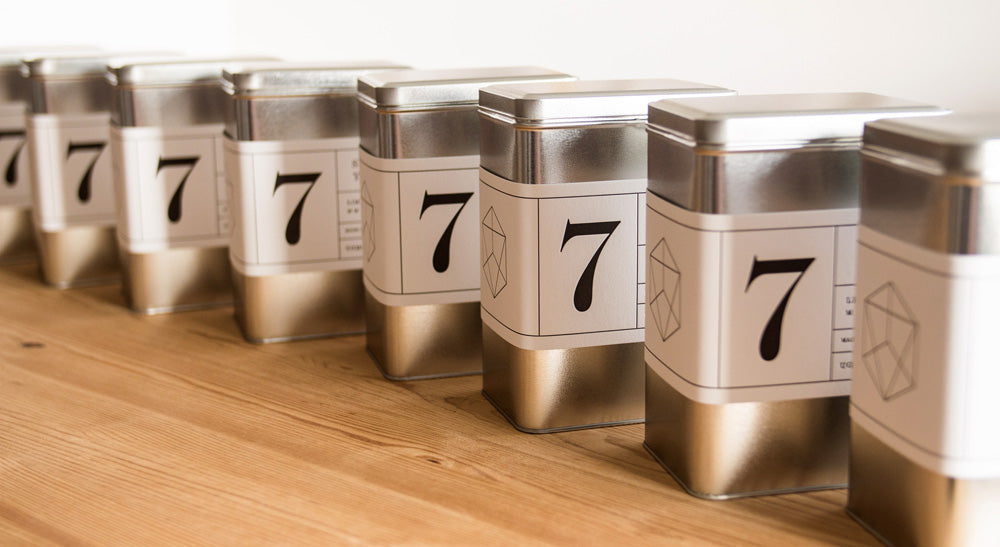
With all of the pieces in hand, we could move onto counting, sorting, assembling, and packing the Anniversary Sets to get everything ready to be shipped out. Even in this seemingly simple stage, we encountered the challenge of figuring out how to adhere the labels onto the tins with everything to lined up correctly. Since there were 300 sets, we needed a process that was easy to repeat without taking too much time per label. We ended up creating a simple, hand-made template out of cardboard to ensure each label would be centered and squarely positioned on the tin. While tasks like these can seem somewhat mundane due to their repetitive nature, this type of quality control and attention to detail is a crucial part of a successful product launch that results in happy customers.


Product Photography
Good product photography is essential to selling products online. If there’s one point I can emphasize the most it’s this. Since people can’t hold it or see the product in person, the photos need to tell the narrative of the set and convey the incredible amount of detail that went into everything. It’s not simply enough to snap a few quick photos and move on. Every detail should be carefully considered, including lighting, focal point, and environment. These photos can make or break how well the product sells. A picture is truly worth 1000 words. For the anniversary sets in particular I like to go all out with the product photography, and this year I even decided to shoot a behind-the-scenes video. While I could have hired out the photography and videography to someone else, showing the product and process through my personal lens is a key part of telling the story of the set. This always takes a huge amount of time and effort to do right, but is worth every bit. (I’ll write more about my photo process in a future post.)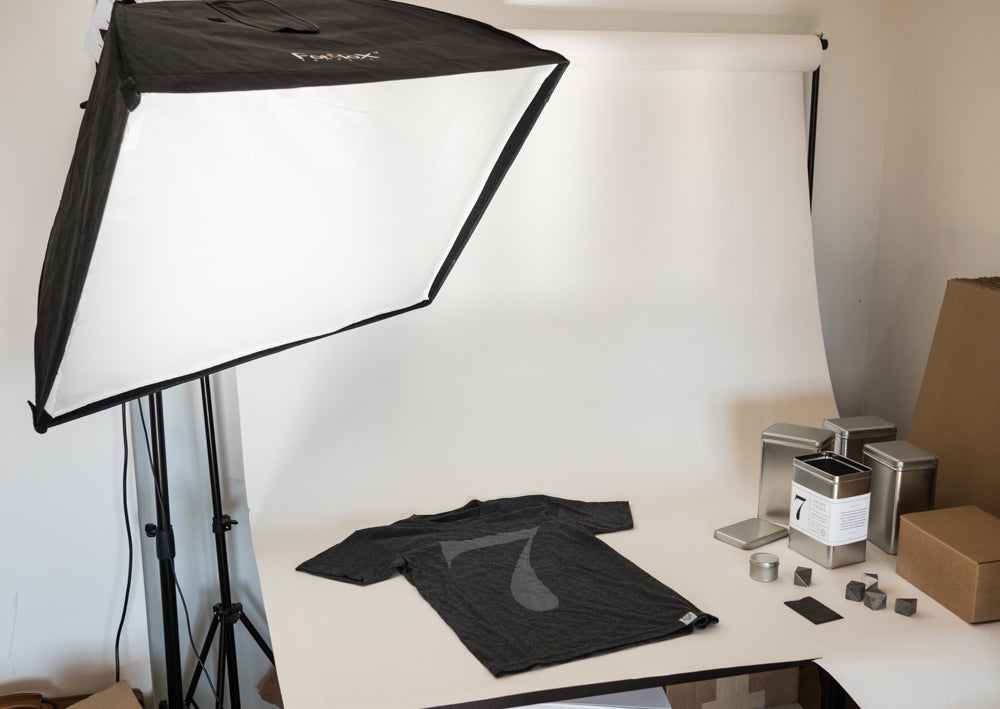


Product Page Design
I needed a place to share all of these photos, so I designed a custom product page for the anniversary set. My goal was to create an immersive narrative for the viewer as you scroll down the page and absorb the story of the set through photos, videos, and text. I'll design the page mockup in Photoshop and then hand it off to my brother for the actual coding and build out.
Product Content
For each new product there are many little details that have to be thought through and planned. This includes product name, product description, dimension and specs, and pricing. One of our goals is to tell a story to go along with each of our products. When it comes to an anniversary set we like to take the opportunity to reflect and celebrate with all of the people that have made Ugmonk a success - our customers. Copywriting is an art form in and of itself. Many brands seem to overlook this part and don’t inject any creativity or personality into the product description. The story breathes life into a product and helps customers and fans connect with the product and the brand. https://vimeo.com/139157653
Ecommerce prep
At this point the anniversary set had to be converted into a product. We had to finalize the description, price, and photos and enter them into our ecommerce system (Shopify). We also had to create the additional images and graphics that need to be created for each product launch such as the homepage banner. Each one of these assets takes time to design and think through since each product is unique. It’s small things like this that can add up quickly but are all necessary for a successful product launch.
3. Launch
Now the payoff! It was finally time to reveal the set to the world. Even after 7 years, I still get the same nervous/excited adrenaline rush each launch day. So much work went into this moment and there are so many things that can go right or wrong. Here are the basic steps I focus on during launch day:1. Publish products in ecommerce system (Shopify) 2. Publish blog post 3. Publish homepage banners 4. Send email newsletter 5. Post across social media (Twitter, Instagram, Facebook)

4. Post-Launch
Now that the Anniversary Set was live on our site and visible to the world, it was just a matter of making sure everything was working and loading correctly on our website and then answering questions or replying to comments on social media. And then the fun part: watching sales start to flow in from all over the world (we hope). No matter how many products I launch, it’s still incredibly humbling to see people spend their money on something that I created.