The Backstory
I wanted to share my inspiration and design process for this year's design Do A Lot With A Little. We all face challenges at work and at home. Our time and money always seem to be stretched thin with “just the basics.” But when we take a moment to step back, we realize the world has even bigger problems: poverty, hunger, and human trafficking, just to name a few. Does giving an extra dollar to the local food drive or tossing a couple coins in the Salvation Army's red kettle really make a difference? I know I’ve wondered that, but this phrase “Do a lot with a little” reminds me of two things:1. You don’t need a lot to do great work.When talented people are driven by common compassion or cause, they're able to find creative ways to multiply scarce resources into something bigger than themselves. This is precisely the definition of any successful organization, whether it be a charity, social group, or business. It’s certainly been a pillar to how we’ve run Ugmonk. Even after 8 years, many parts of Ugmonk are still very DIY and grassroots. Even though we don’t have as many resources as the “big guys,” I always strive to put out quality products on par with or better than any other brand out there. This doesn’t mean we have big budgets and fancy equipment because we certainly don’t—it just means getting creative and making do with what we do have. Another example is our great partners that run Rice Bowls and the Good Shepherd Children’s Home in Honduras. They've given us a front row seat on how to make a big impact on young lives with just a few resources.
2. My little contribution is not about me.Giving time or money to something isn't about me as an individual. It’s about acknowledging that I am insignificant on my own, but when I join together with others to help, even the littlest bit can do a lot. So next time you’re tempted to make the excuse that you don’t have enough to [fill in the blank], remember that you can “Do a lot with a little.”
The Design Process
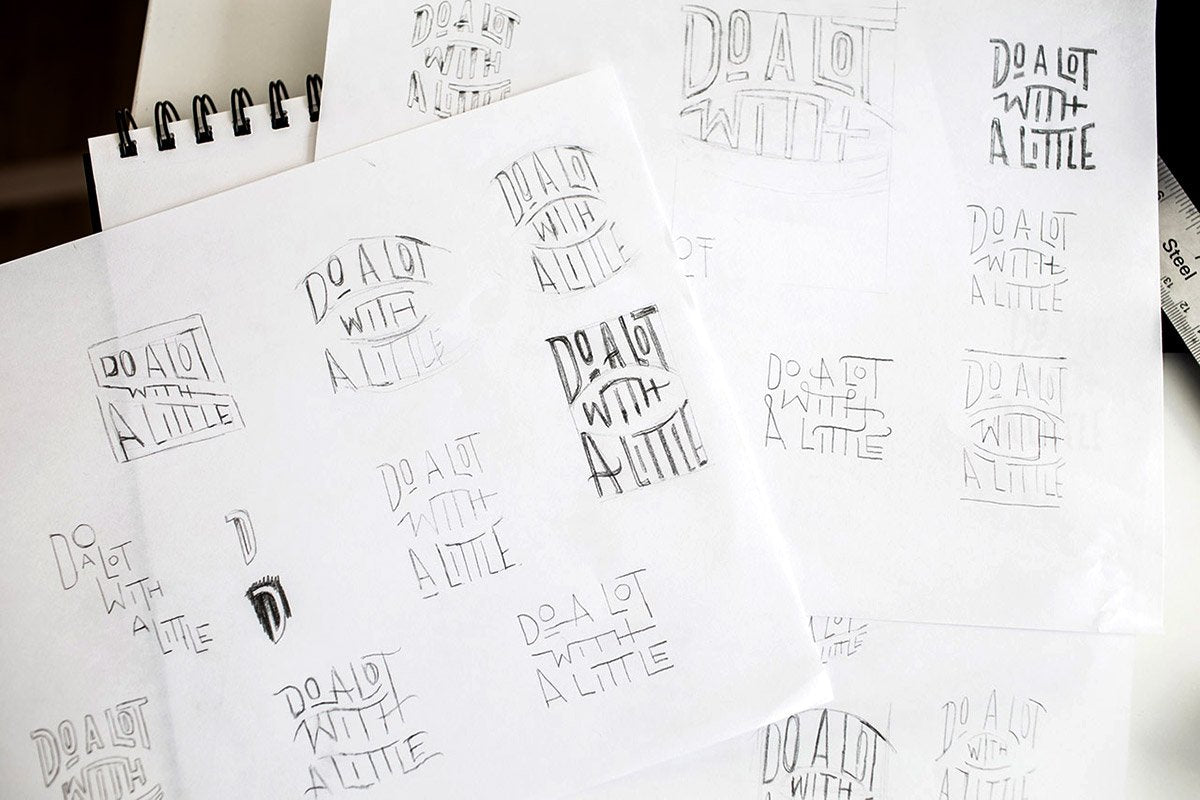
The design process for this tee started with a bunch of rough pencil sketches. Since much of my day to day is working on my computer, it felt great to approach this design by getting my hands dirty. Starting on paper allows me a freedom to explore concepts and layouts that I may not realize if I were to jump straight into Illustrator.


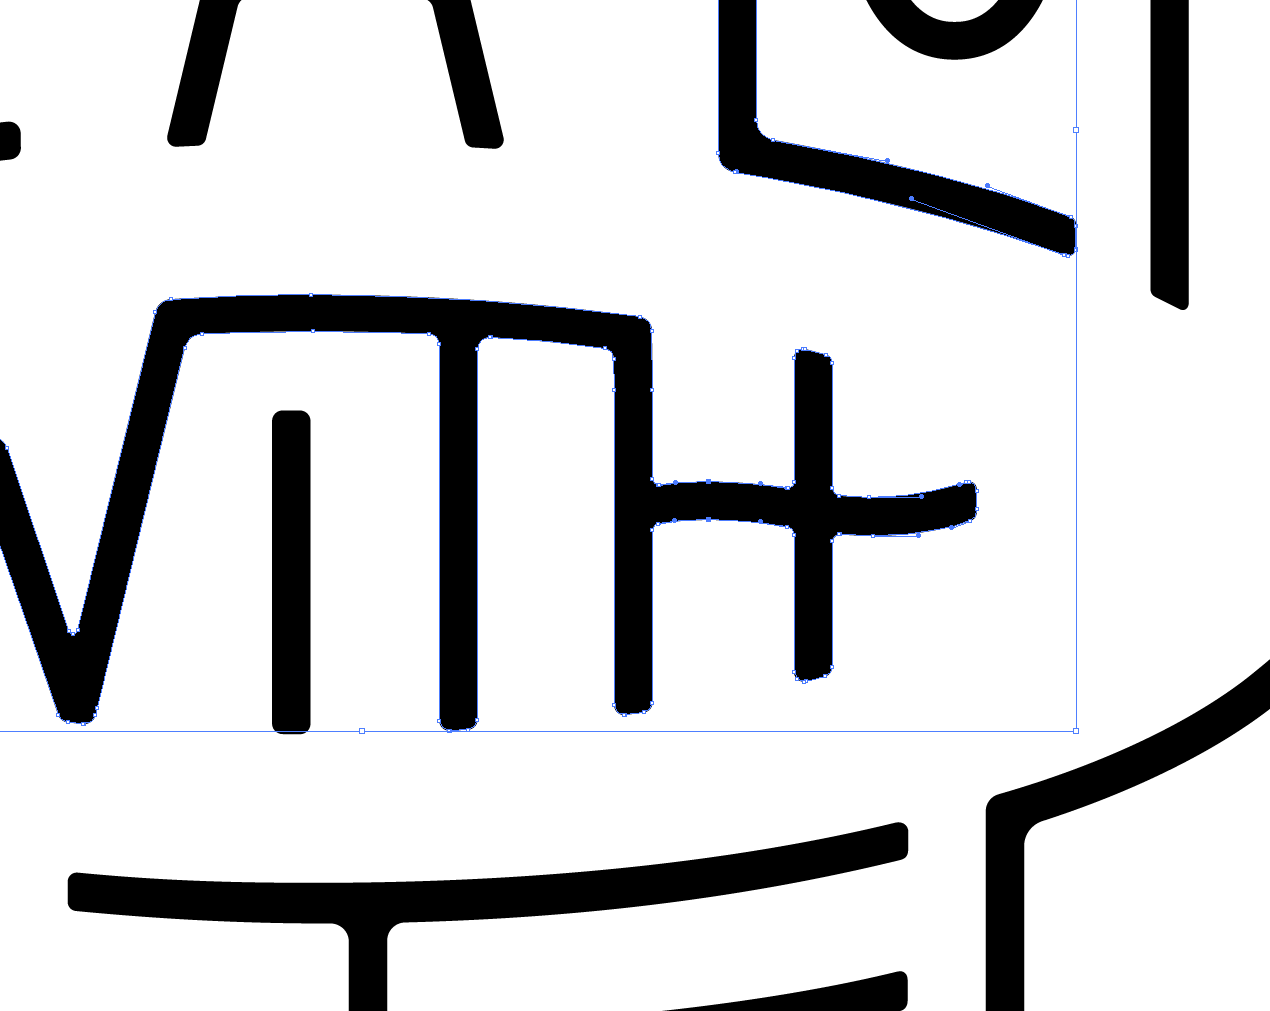
 Once I narrowed down the sketches, I jumped into Illustrator and manually drew each letter with the pen tool. In the beginning I worked very loosely to build the basic structure of the letters, and then go back and refine.
 Next, I explored a variety of warped shapes and asymmetrical layouts. I eventually came back to the original square format that I started with, but this process helps me see things from different perspectives.
 With the main structure in place, I then spent a lot of time tweaking the spatial relationships between the individual letters and experimenting with different line weights. This is a long, tedious process and there's no real trick to it other than taking time to visually balance the composition.
 The last step was to soften up the sharp corners of the letters by using the "live corners" tool in Illustrator. This tool gives you precise control to manually adjust the radius of each corner and transition. It's a subtle difference, but it made the design feel more cohesive.
 After hours of small revisions and tweaks (over the course of a couple weeks) I finally arrived at the final design. Here's a little time-lapse to show the progress from beginning to end.
 And here's the finished tee which is now available in heather gray and navy.


Hope you enjoyed this peek into my process and the inspiration behind this new design. Jump over to the shop to see more photos of the finished tees. Feel free to ask questions in the comments below.

