Don't want to build your own? We just launched the New Gather Collection on Kickstarter which includes a monitor stand + whole system of desk accessories.
Pre-order Gather here →
The backstory of my original monitor stand
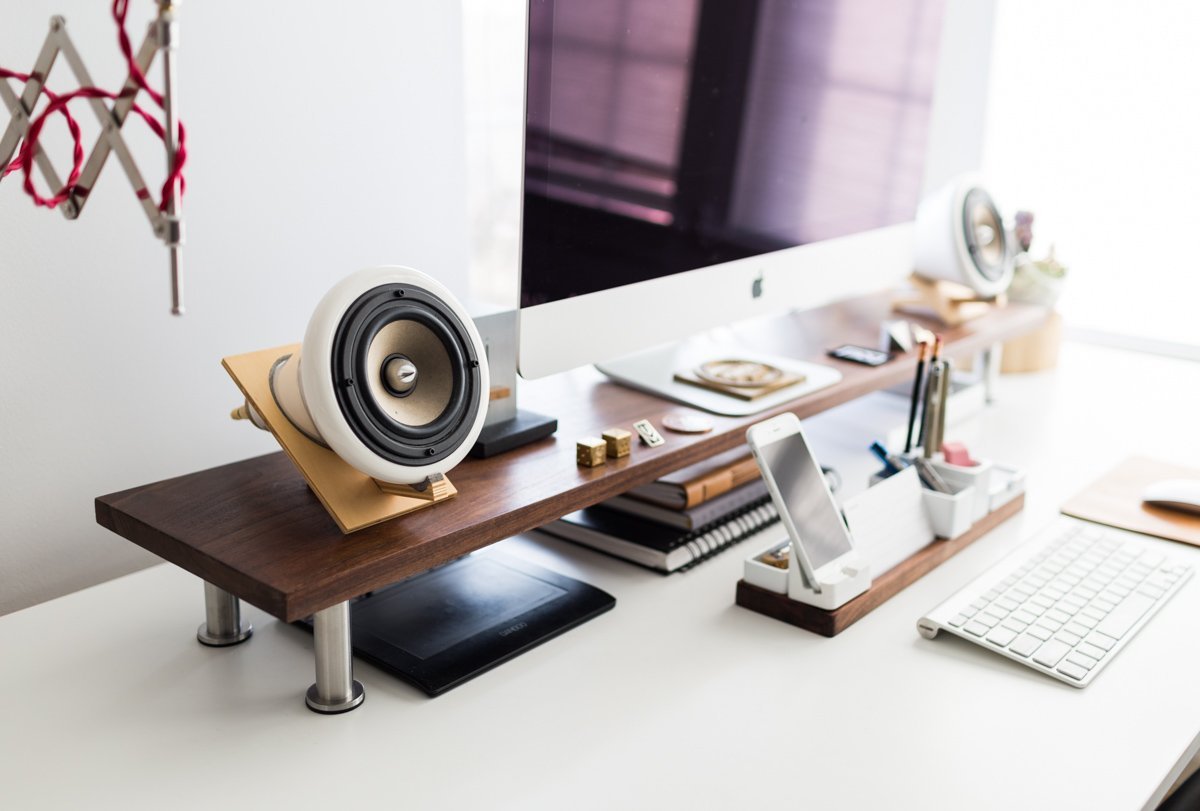
One of the most common questions I receive whenever I show a photo of my workspace is, “Where’d you get that monitor stand?” It’s actually a little IKEA hack that I put together several years ago. My goal was to raise my 27″ iMac to eye level to create a better ergonomic position so I wasn’t hunched over at my desk. It also helps to better utilize my desk surface by creating space to store things like my external hard drive. Since I still get so many questions about my monitor stand, I wanted to write a more in-depth post about how I built it, as well as walk you through the new premium version that I just built. I'm not necessarily the handiest person, but I do enjoy building simple things like this especially when I can’t find an existing solution available anywhere else. Even if you don’t have much experience building things, you should be able to easily complete this in a weekend.The Premium Version Monitor Stand
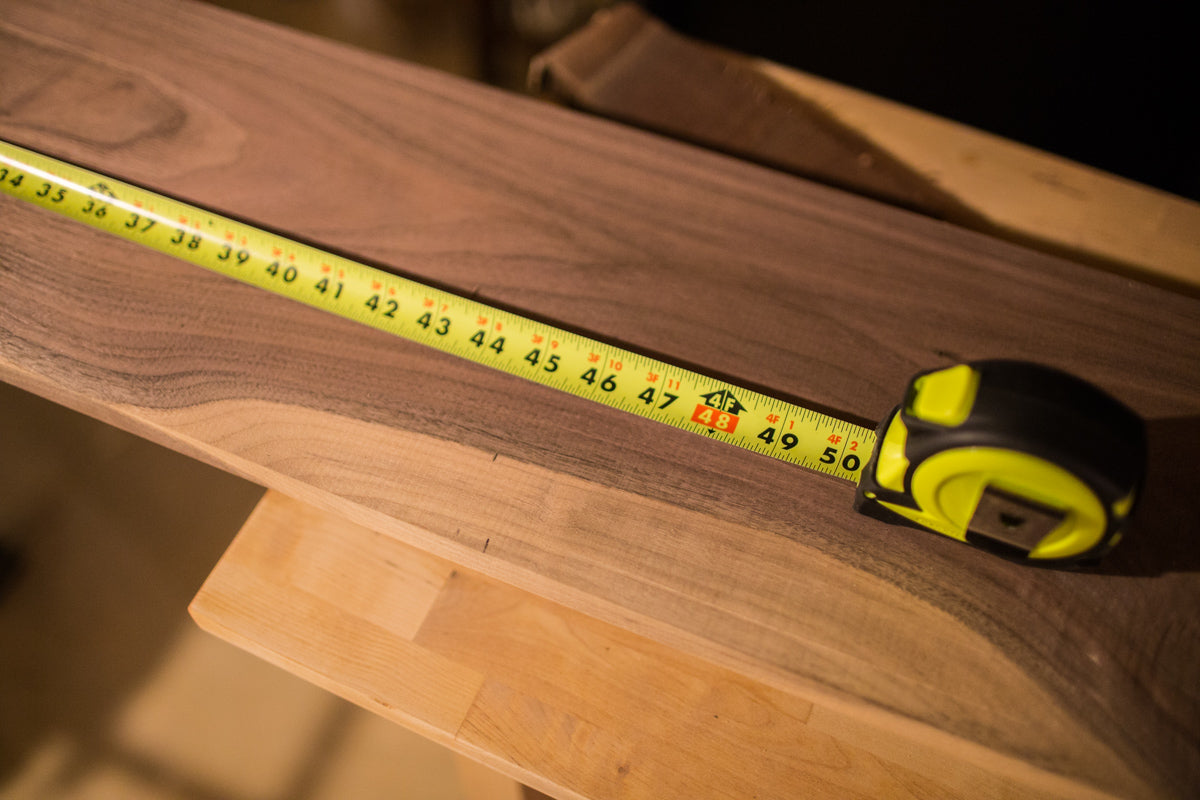
Recently, I was thinking about how I could upgrade my monitor stand by using a solid piece of walnut wood. Just a couple minutes from my house, I have an awesome wood supplier, Woodcraft, that stocks slabs of all sorts of specialty woods. (They have stores all across the US, and you can find the nearest one to you here). The staff at Woodcraft are super helpful for providing advice on all things woodworking. I purchased a long slab of American Black Walnut that had beautiful grain and character. Some people might see the cracks and irregularities as flaws, but I think these things add to the unique character of the wood. The beauty of using a solid piece of wood like this is that it only requires a simple oil finish to bring out the beautiful grain. No stain needed. The slab I purchased was actually large enough to make two monitor stands, so I’m giving one of them away. See details below. Here are the instructions of how I built the new premium monitor stand:- Cut walnut slab to desired length. I did around 45” length for my setup, slightly shorter than the IKEA version.
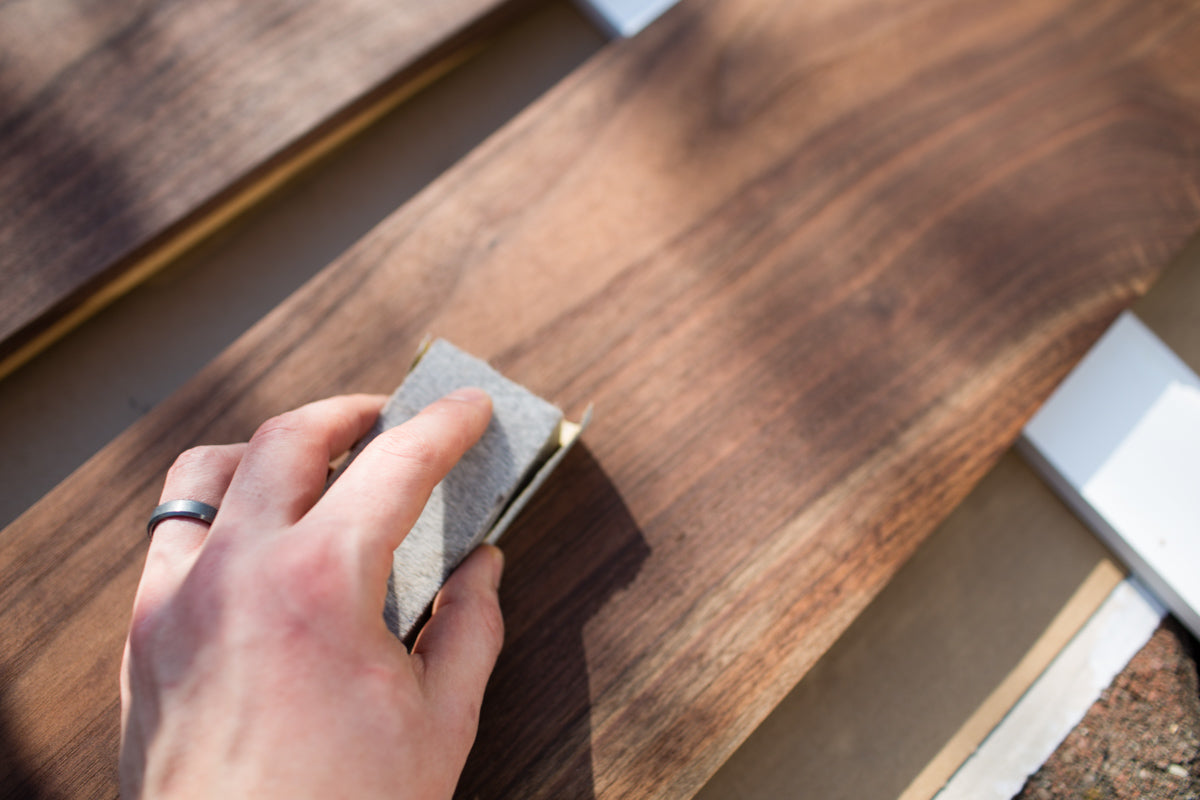
- Sand the wood, working from coarse to fine grit starting with 80, 120, 150, 180, and 220. I have a Makita orbital sander that makes this pretty easy but you can also sand by hand since it’s not a huge surface area.
- Wipe the sawdust off of the wood with a clean rag.
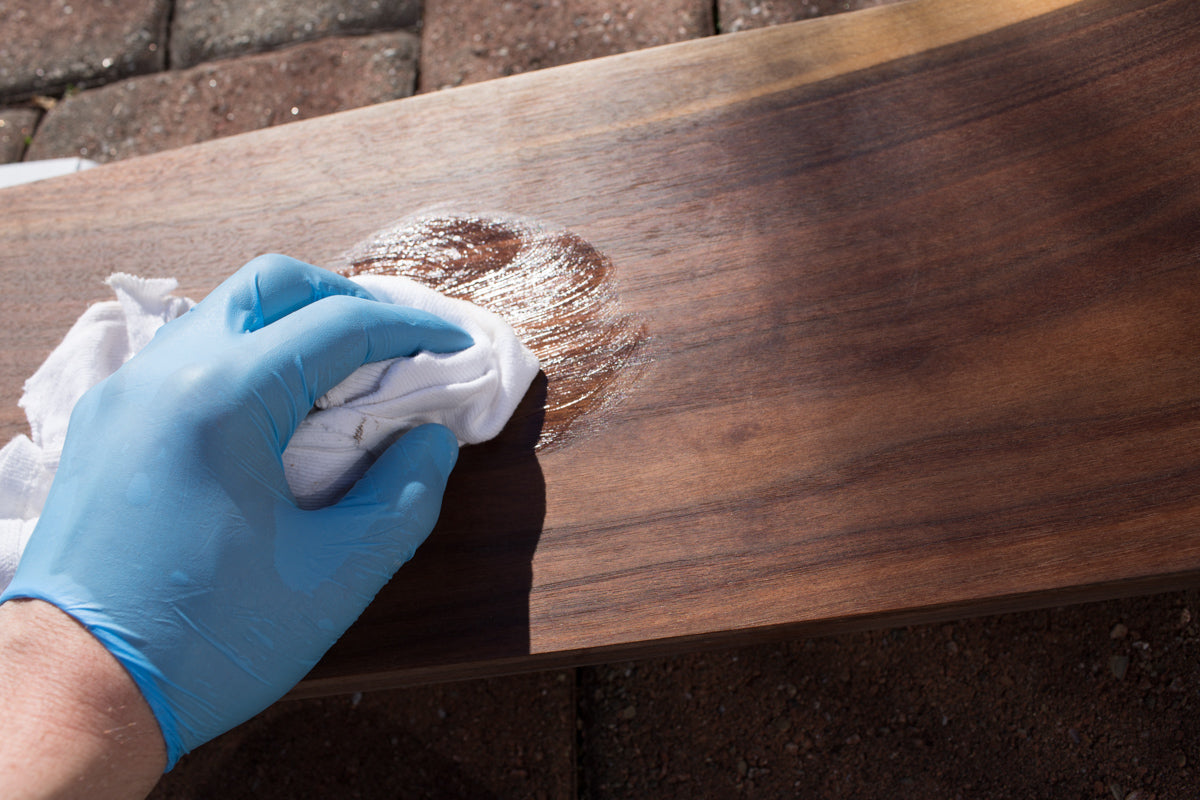
- Using another clean rag, apply a thin coat of Danish oil to all sides of the wood. I use Tried & True Brand Oil, which was super easy to work with.
- (Optional) I used special #220 grade wet/dry sandpaper to wet-sand while the oil was still on the surface of the wood. This creates an even smoother finish by pushing the wood fibers down into the surface.
- Allow the oil to soak into the wood and dry for at least 6-8 hours.
- Lightly sand with steel wool pad (I used super fine #0000 grade).
- Apply a second coat of oil with a clean rag. Repeat steps 6-8 as many times as desired. The more you do this process, the smoother the finish.
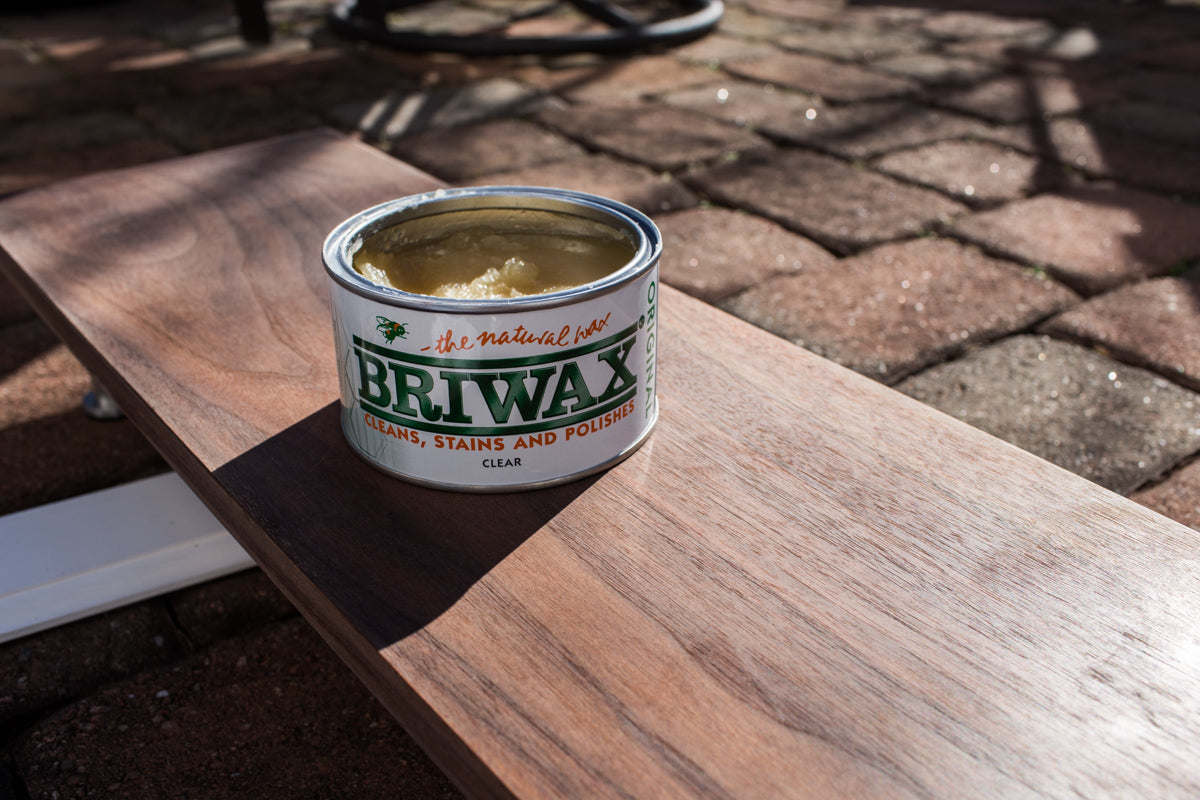
- (Optional) To give the wood an even smoother finish and polished look, I applied a natural clear wax. Apply the wax with a clean rag and buff the surface. The more you buff, the smoother and shinier it gets.
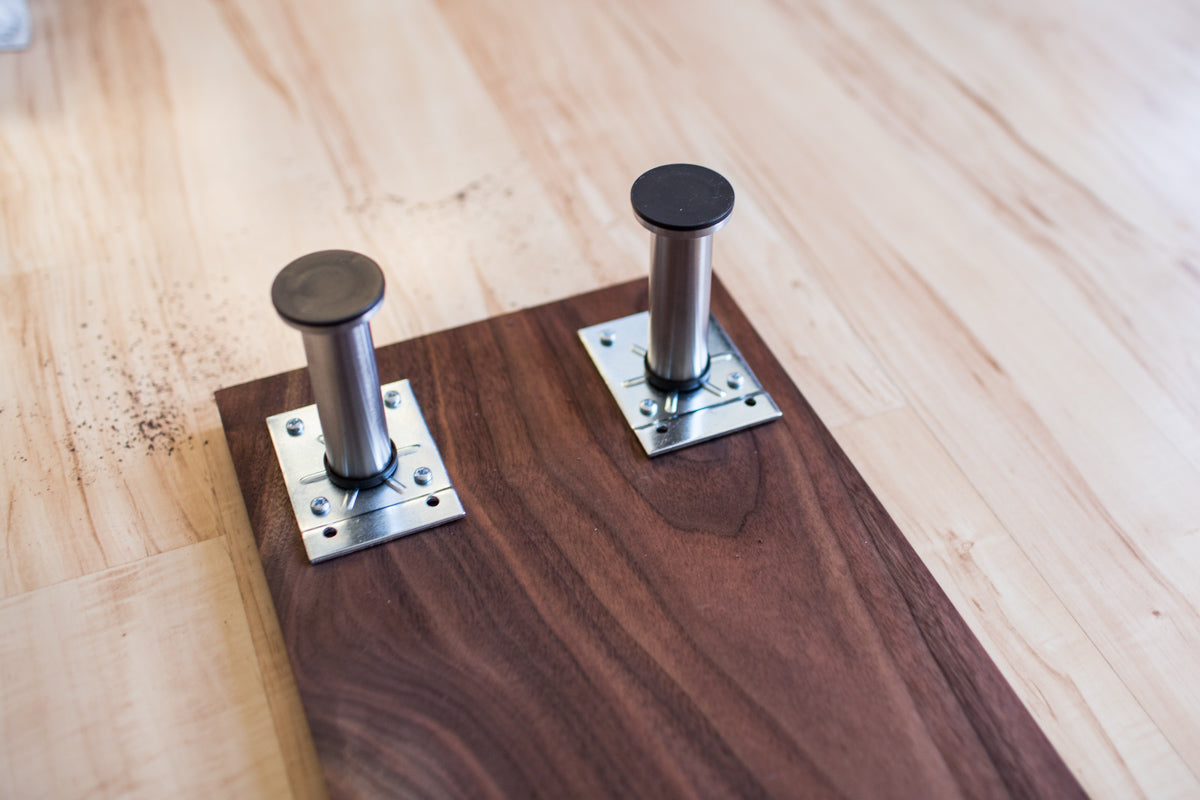
- Measure where you'd like to mount the IKEA Capita legs, and make a small mark with a pencil. I positioned them approximately 1" from the outer edge of the board.
- Drill 4 pilot holes in the wood for each leg bracket. This helps to prevent the wood from cracking when the screws are drilled in.
- Attach brackets by screwing in all four screws for each bracket.
- Screw each leg onto the bracket.
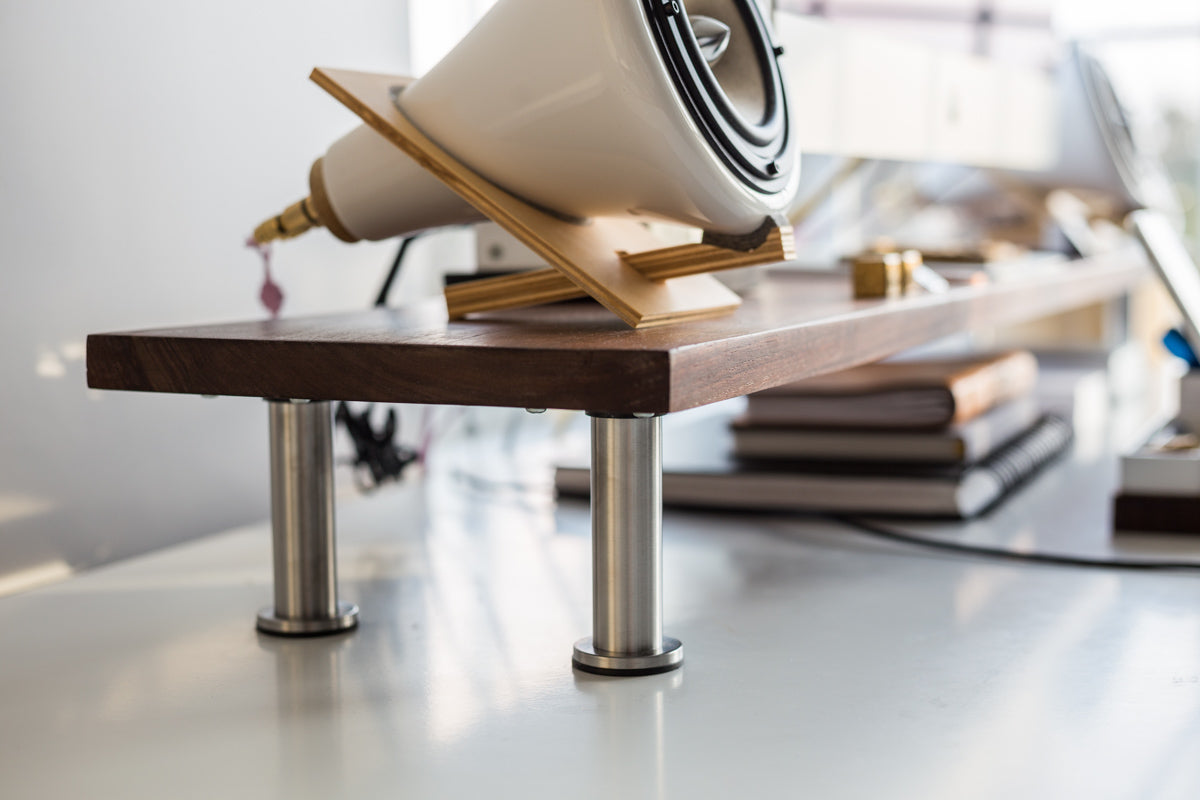
- Level the monitor stand by adjusting each leg individually.


The Basic Version Monitor Stand
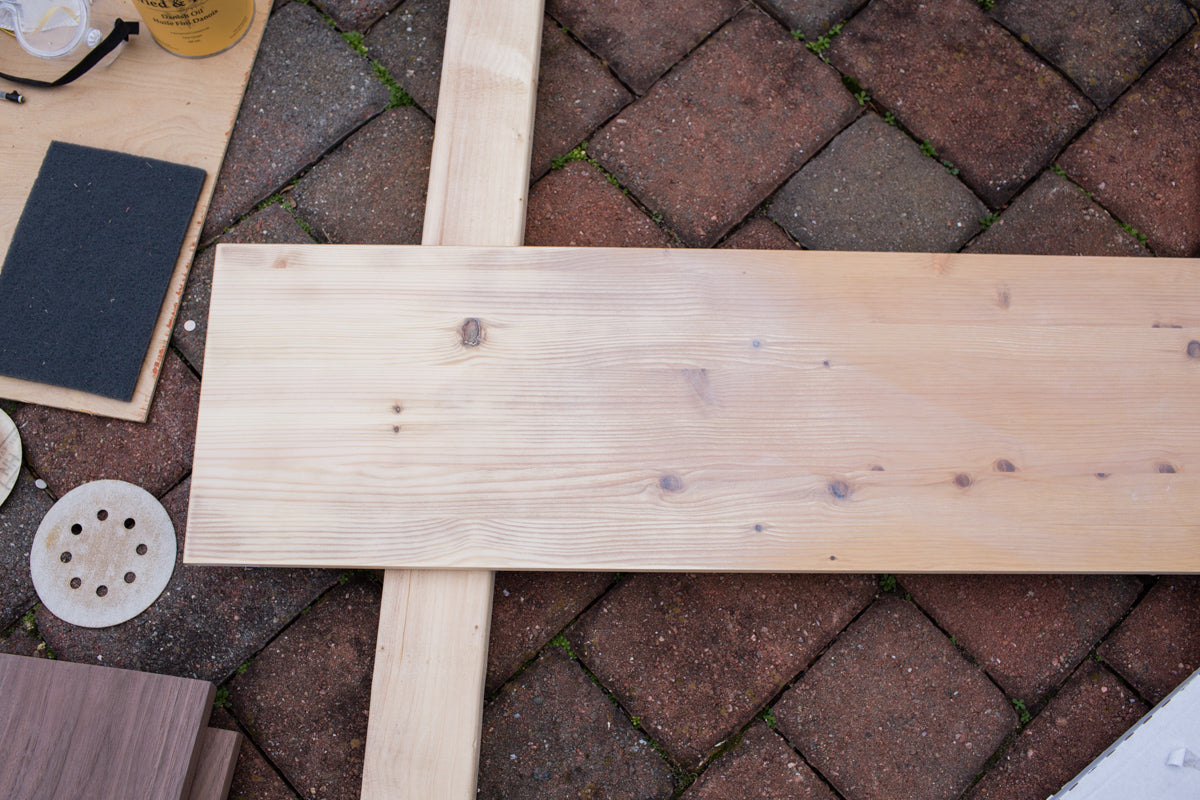
I made the original monitor stand using two IKEA parts: the Ekby Hemnes shelf ($20), which is essentially just a piece of solid pine wood; and the 4″ Capita legs ($12). Here are the instructions for building the basic monitor stand. The steps are pretty straightforward, but feel free to leave a comment below with any questions.- Sand the wood working from coarse to fine grit starting with 80, 100, 120, 150, and 180. I have a Makita orbital sander that makes this pretty easy, but you can also sand by hand since it’s not a huge surface area.
- Wipe the sawdust off of the wood with a clean rag.
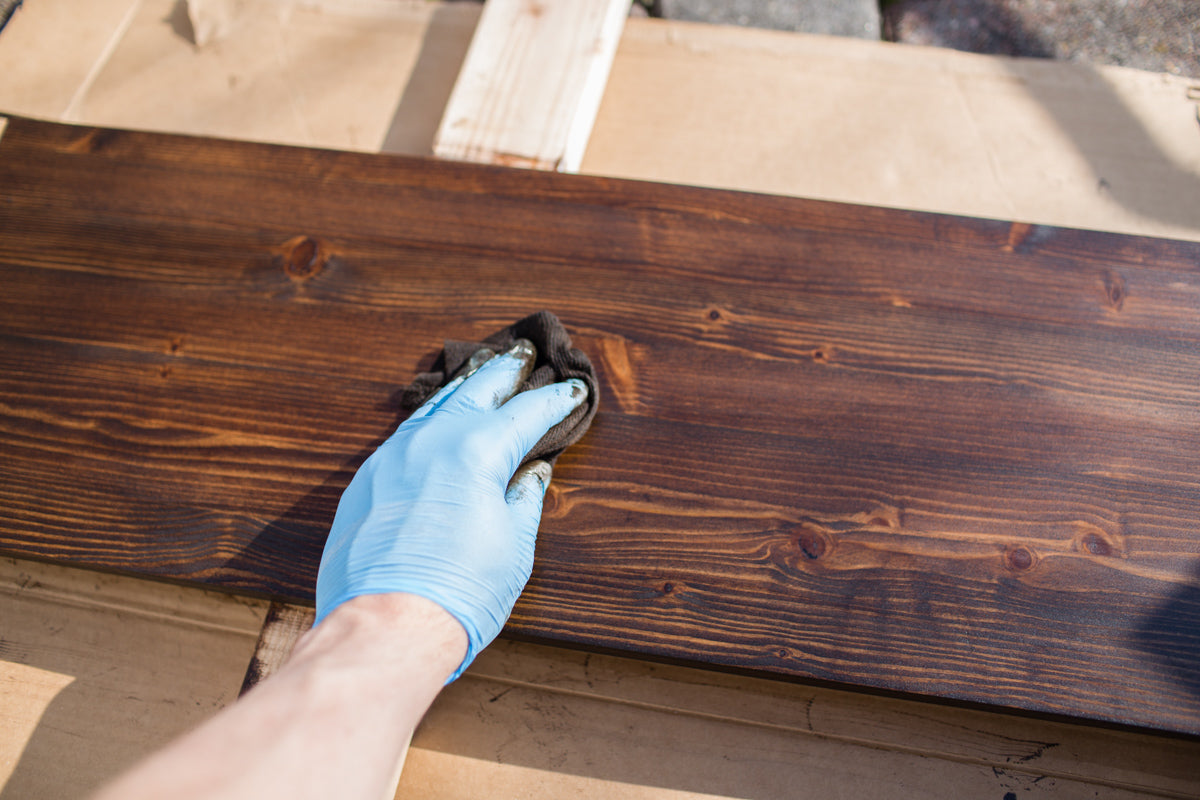
- Apply the stain color of your choice using a clean rag or brush. I used an “Espresso” color from MinWax but whatever stain color you prefer.
- Allow the stain to penetrate into the wood for 5-10 minutes
- To darken the color, apply a second coat of stain.
- Allow the stain to dry for 4-6 hours.
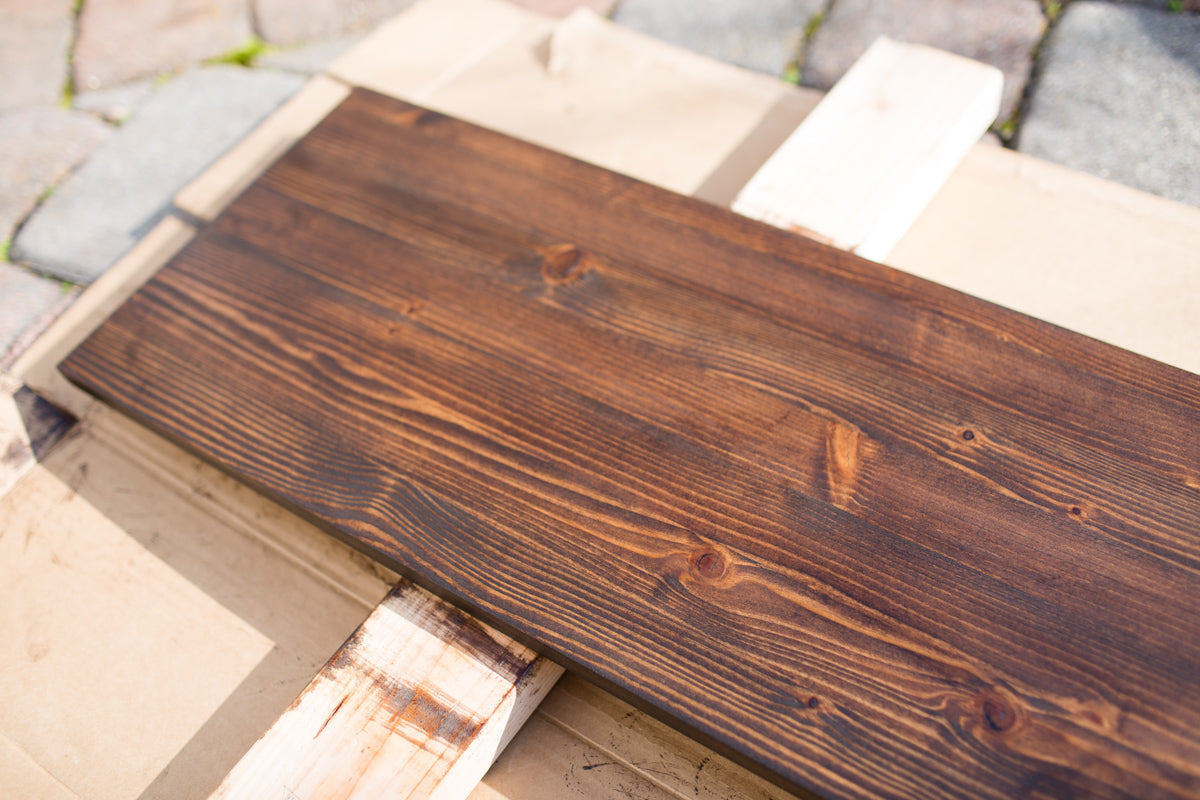
- Seal the wood with a clear polyurethane or Danish oil. Polyurethane will yield a glossier finish and better protect the wood from spills and scratches, while Danish oil leaves the natural surface of the wood exposed and can be easily re-oiled in the future. Either one works great, just depends on your personal preference. I used a glossy polyurethane and applied it with a foam brush. Apply as many coats as desired.
- Measure where you'd like to mount the IKEA Capita legs, and make a small mark with a pencil. I positioned them approximately 1" from the outer edge of the board.
- Drill 4 pilot holes in the wood for each leg bracket. This helps to prevent the wood from cracking when the screws are drilled in.
- Attach brackets by screwing in all four screws for each bracket.
- Screw each leg onto the bracket.
- Level the monitor stand by adjusting each leg individually.


Tip: It seems that the newer IKEA Ekeby Hemmes shelf has some type of coating on it. Make sure to thoroughly sand the surface so the stain will penetrate. As you can see, the underside isn't perfect but it's ok since it won't be visible. I thoroughly sanded the top and it turned out perfect.