 Ugmonk has always been about designing products that fit my personal aesthetic. And while I’m no home design expert I wanted to share the design process that went into remodeling our kitchen. When my wife and I bought our first house a few years ago it wasn’t in terrible shape structurally, but it needed a lot of cosmetic work, updating, and repairs. The previous owners had a very eclectic taste with their decor and color selection so it’s taken a lot of time and sweat equity to transform it into our modern, minimalist style. Before we even moved in, we spent a full month doing major cleanup and cosmetic upgrades throughout the house to tackle as much as we could. Since then we’ve been doing smaller projects each year, working one room or area at a time to create a home that we love. The existing kitchen was functional (for the most part), but we really wanted to remodel it to make a better use of the space, improve the functionality, and match our aesthetic. This was a major renovation so we chose to wait until we addressed other more urgent projects throughout the house and saved up some money to do it right. Anyone that’s gone through a kitchen renovation knows how much of an inconvenience it is to live without a kitchen for while (especially since I work from home and we cook almost every day). Prior to the actual renovation my wife and I spent several months researching, planning, and designing the space to figure out as much as we could ahead of time. This included gathering inspiration on Pinterest, measuring and mapping out floor plans, and fussing with the super janky IKEA kitchen planner tool. (This tool has so much potential but is an absolute pain to work with). Here are a few “before” pictures of our kitchen:

Installation
I’m fairly handy with basic tasks around the house, but for this big of a job we decided to hire a professional contractor to do the actual installation. One of the things I’ve learned over the years with both personal projects and with Ugmonk is to balance do-it-yourself with hiring experts. We were able to save a lot of money by doing all of the design planning and cabinet assembly ourselves, but hiring a contractor (who happens to be a friend and really good at what he does) was a VERY worthwhile investment.


Aesthetic
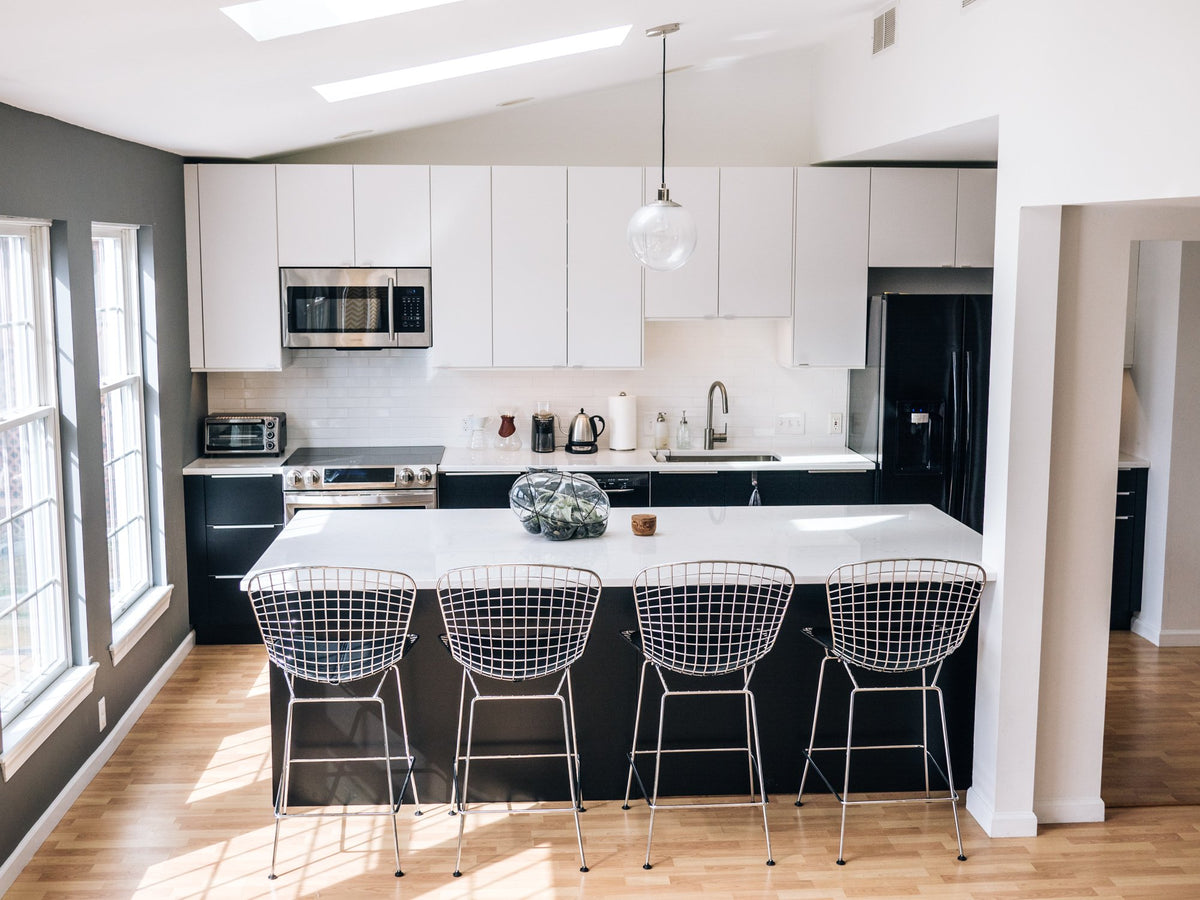
We knew from the start that we wanted a bright, modern aesthetic with clean lines and monochromatic color palette. We’re big fans of Scandinavian design and wanted to create a space that would look great for years to come. One of the most challenging aspects about doing a kitchen renovation is that it can get super expensive super fast. We wanted to spend money on quality materials that will hold up over time and require very little maintenance but without having to sacrifice on style. Unfortunately most of the options available in big box stores like Home Depot or Lowes didn’t fit our modern aesthetic and are just plain ugly. It took a lot of digging and searching but we were eventually able to find materials and fixtures that looked great and were reasonably priced (although we did splurge on a few items).
Cabinets
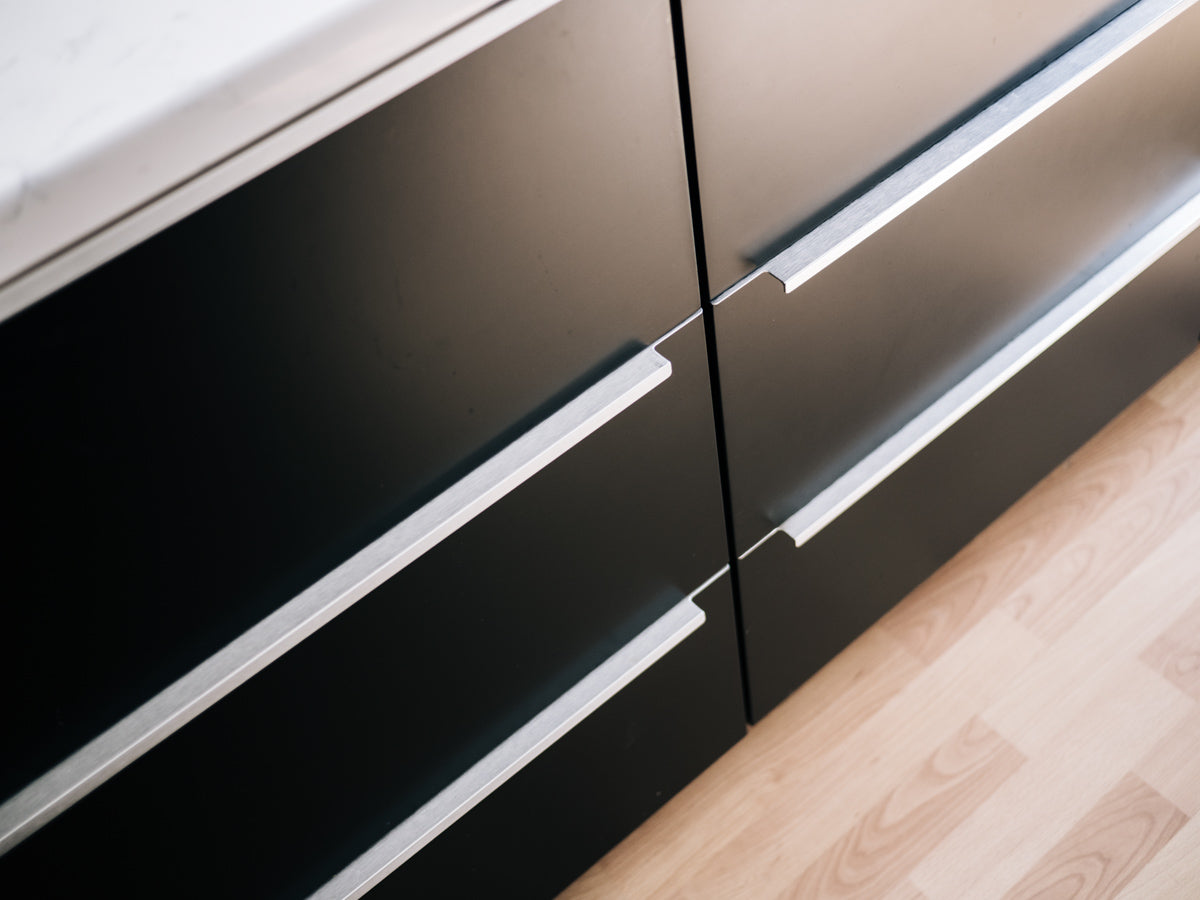
Our original vision was to do all white cabinets with a dark gray countertop, but after doing some mockups we realized that our black appliances would really stick out and cause the room to look disjointed. So we decided to switch to a split design with black lower cabinets, white upper cabinets, and a marbled white countertop. Though it was tempting to look at high-end cabinet brands, we actually liked the simple cabinets that IKEA offers and had heard great things about their new kitchen system. Using IKEA cabinets was one of the main ways we were able to keep the cost down. And since I’ve probably assembled more IKEA furniture in my lifetime than most IKEA employees, we were fine with doing all of the assembly ourselves to save money. Just be aware, building an entire kitchen is no small task. Here’s what it looks like during the process:
  After we decided to do black and white cabinets, we found out that IKEA doesn’t actually make cabinets that are a true black color (almost everything they make is black-brown). After doing some research and asking around, we found a local Amish woodworker who was able to make custom black doors that matched the shape and sheen of the white IKEA doors to keep everything consistent. It was a tedious process to make sure all of the measurements were correct, but the black doors turned out amazing. Thankfully we were still able to use the IKEA cabinet bases combined with the custom black doors.


 We decided to make the new upper cabinets 10 inches taller than the original ones to fill the space better and provide extra storage. Rather than doing one tall cabinet on the right of the refrigerator like the original kitchen, we continued the split cabinets and countertop to extend the horizontal lines and bring continuity. This also created a perfect space for keeping non-food items like mail and papers that used to pile up on the main island.
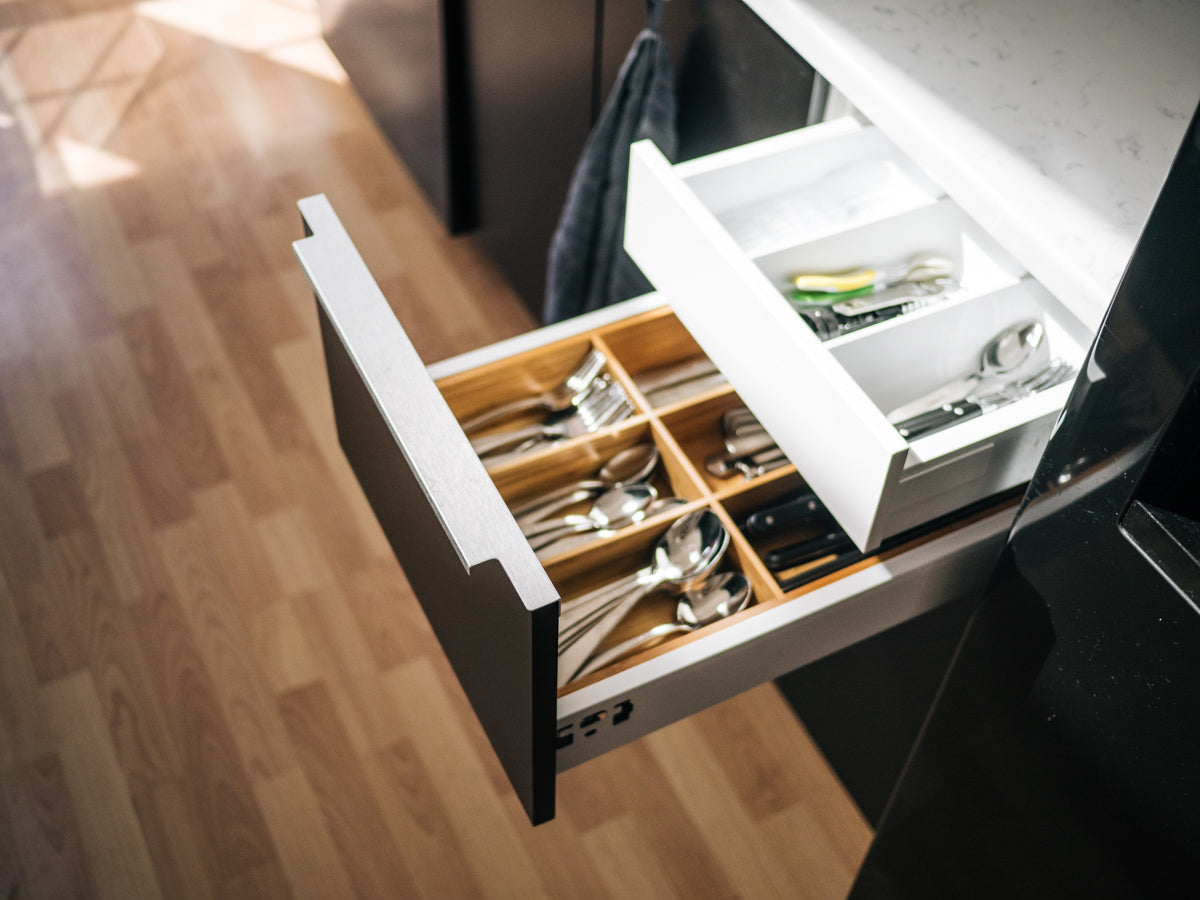
  Say what you want about IKEA’s quality, but their new kitchen system is very impressive and sturdy. The engineering and thought behind each piece is incredible. The new drawers and hinges snap together and require very little hardware. IKEA also makes nice soft-close hinge attachments and for both the doors and the drawers.
It may seem like a small thing, but being able to throw a door closed without it making any noise is one of those little details that makes a big difference.


Functional Changes
One of the biggest functional changes we made was moving the cooktop off of the island and combining it with the oven along the back wall. This created a huge clean island surface that can be used for food prep, entertaining, and eating. By moving the range to the back wall, we were also able to eliminate a lot of clutter and dirt from the island (where everything always seems to end up). We chose an induction range which heats the pan through magnetic induction which is faster and more efficient than a typical flame or electric heating element. As an added benefit, if a pot boils over or food splatters it won’t burn onto the cooktop since the actual burner doesn’t get hot. This makes it amazingly easy to wipe clean.The range was our biggest splurge, but well worth it since we use it every day.

 In addition to gaining space by removing the cooktop from the island, we also enlarged the island by two feet in each direction to incorporate the structural pillar that was previously just standing alone in the middle of the kitchen. This also provided more room for seating and helped define the kitchen as a cohesive space. Plus, we’re loving the added storage.

Countertops & Backsplash
When we switched to black lower cabinets we also decided to switch to white countertops. My wife and I both love the look of carrara marble, but it was WAY out of our price range and required too much maintenance. Since a kitchen countertop tends to takes a beating we wanted something super durable and wouldn’t stain and eventually decided on a white textured quartz which has a similar look to marble but is much more affordable and easier to maintain.

 We wanted to emphasize the horizontal lines along the back wall, so we chose an elongated 2”x8” white subway tile and white grout for the backsplash.


Sink and faucet
While some people prefer having multiple sinks with lots of bells and whistles, we just wanted a simple setup that would be versatile and easy to use. As a result, we chose a large rectangular undermount sink made from a heavy-grade stainless steel. Regardless of your sink configuration preference, I would definitely recommend an undermount sink. The undermount creates a seamless transition without the annoying edge that crumbs and dirt always get trapped in.
 A faucet seems like a simple thing, but when you think about it you will interact with it for varying needs and in varying states of dirtiness. We found a stainless steel curved faucet that can change the flow and temperature of the water with one hand. It also has an integrated hose sprayer which is great for more precision or washing larger dishes or pots (or dogs).
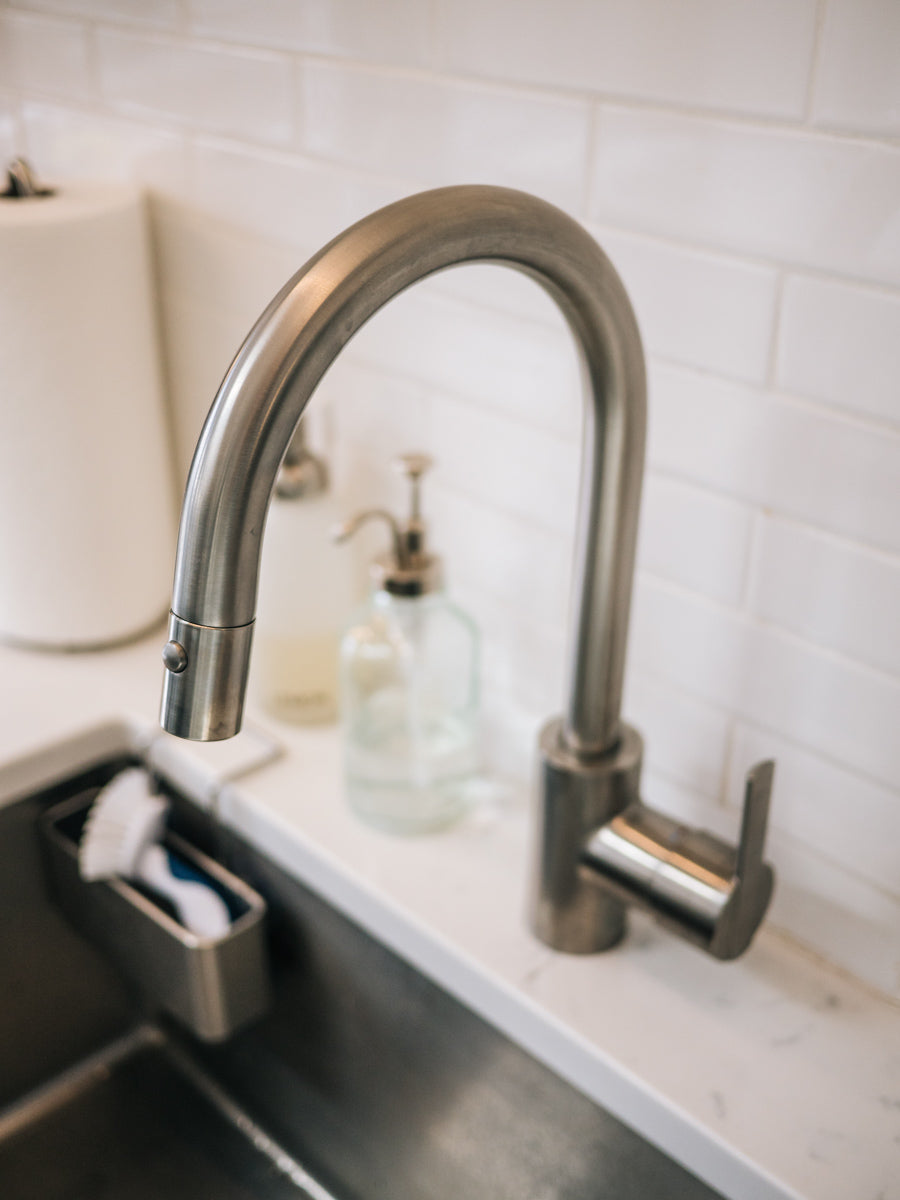

 Finally, we installed a new garbage disposal which is more powerful and reliable than our old one that constantly clogged, and underneath the sink there was just enough room left for a pull-out trash can. (While the trash can doesn’t hold quite as much as a full-size trash can, it stays out of the way and forces me to take out the trash more frequently which my wife appreciates.)
Seating
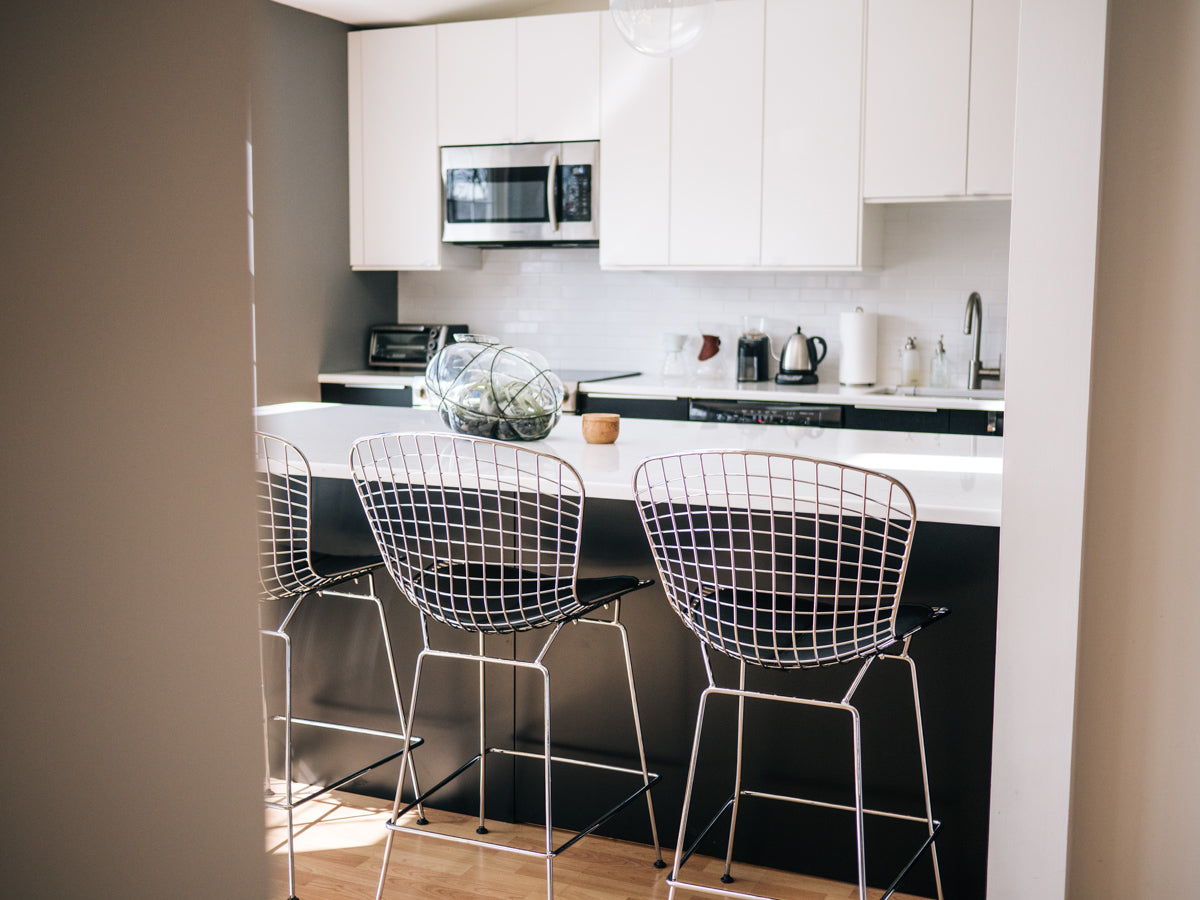
Finding modern bar stools that were both comfortable and didn’t break the bank was especially challenging. Most of the bar stools that look great either had no back (which is not great for sitting long periods of time) or cost more than a mortgage payment. After a long search, we found these wire counter-height stools online for a decent price. They are actually replicas of the classic mid-century Bertoia chairs, and in addition to complementing the rest of the kitchen nicely, they are surprisingly comfortable. 

Other Small Details
Under cabinet lighting is one of those details that doesn’t seem super important, but actually makes a big difference.It’s helpful to have additional light while prepping food or cooking, and the lights also make for a nice mood during the evening when the rest of the house is dark. We asked our contractor to prepare the electrical wiring during the demolition phase so that we could hardwire the LED lights that are mounted under the cabinets.
 To create a nice focal point on the large island, we found a beautiful hand-blown glass terrarium that we filled with black river rocks and a few air plants. Air plants do require a lot of light so they should survive here, but we’ll see. The only other item that we keep on the island is the frequently-used olivewood salt cellar.
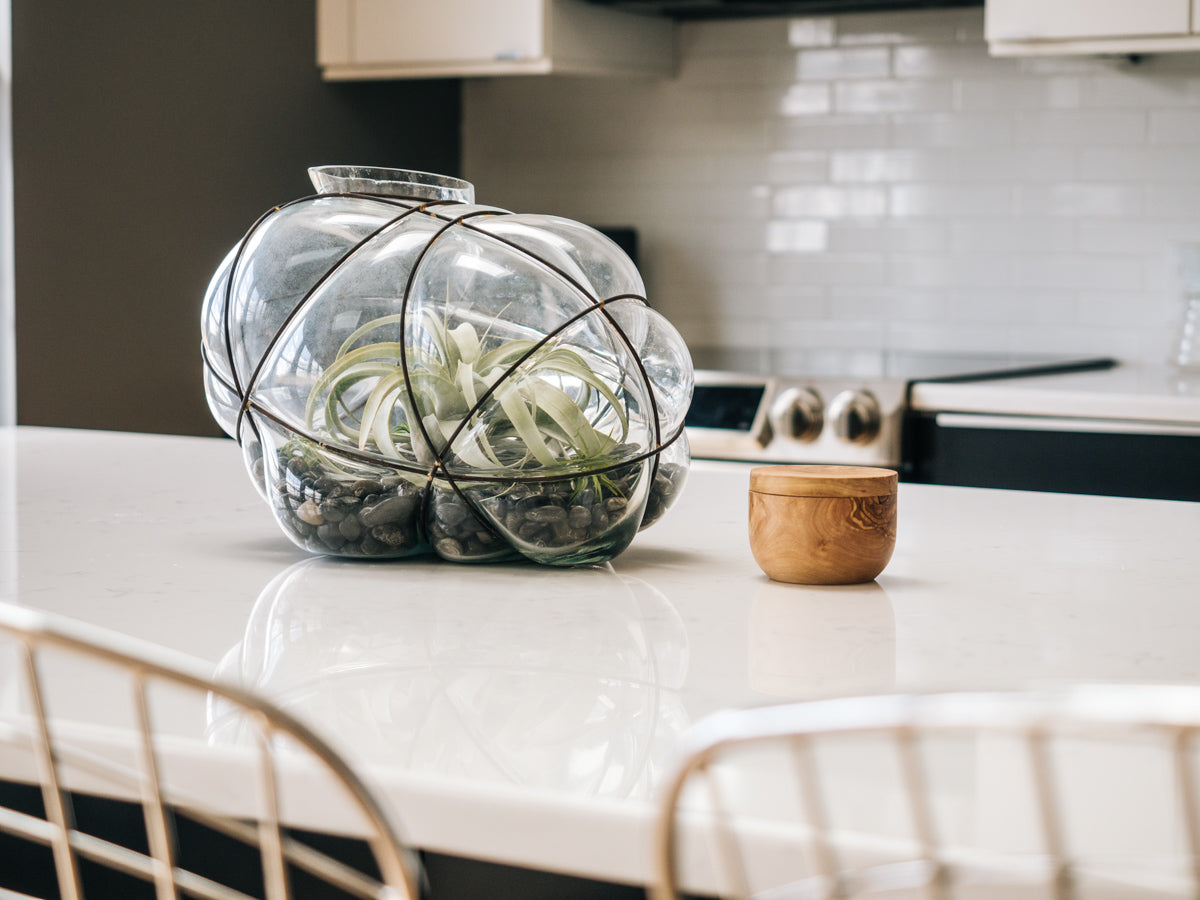


 This was a massive project and dragged on longer than we anticipated, but we’re thrilled with the final result. Whenever we entertain and have friends over the kitchen tends to be the place where everyone hangs out, so it’s nice to finally have a space that’s not only functional but feels great to spend time in.
After all, it’s ultimately not about the kitchen itself but about the time spent with family and friends enjoying it.

Hopefully our experience has helped or inspired you!
Have a question about our kitchen renovation? Leave a comment below or tweet at me here.

